So, you’ve owned your car for a couple of years. It’s a great ride and you love it dearly, but it’s somewhat lost its luster. There are a couple of big scratches, a dozen of smaller ones, and countless swirl marks. The car’s paint has faded and there are hard water spots all over the place.
Perhaps you’re buying a new-to-you daily or getting rid of your current one and want to raise its resale value. Whatever your situation is, there is a reasonably quick and cheap way to make the entire vehicle look like a million bucks… or at least a thousand more.
Yes, we’re talking about polishing the paint and moving beyond the traditional car wash. Despite what many detailing shops would like you to believe, you can absolutely polish your own car, and with just a hundred or so dollars worth of tools and products.
Want to restore the original splendor and shine of your vehicle? Let’s get cracking.
Reverse is the newest car detailing product that easily removes scratches and swirls by hand. This car scratch remover and car paint scratch repair compound will bring your paint back to new. It's also a water spot remover and swirl remover. Make paint correction easy with this all in one formula.
- Repair car scratches, swirl marks and water spots.
- Will also remove oxidation, spider marks and paint imperfections.
- Works by hand, no fancy tools needed.
- Contains no fillers, silicone or wax.
- No hazing, no streaking.
- Product contains 4oz of all-in-one paint correction compound.
Why Polish Your Car?
Despite your best efforts to look after your vehicle, it will naturally lose some of its shine and reflectivity after a few years. This is completely normal for all cars driven regularly.
There are two main reasons why the finish of your car grows dull over time — scratches and contamination.
Scratches come in all sizes and shapes. It’s easy to spot the big gouges and scuffs, which appear white and rough on the surface of the clear coat. But even if the clear coat is looking just fine at first glance, we can assure you, there is a whole range of defects on the microscopic level like marring, spider webs, and hazing. You can see these small areas under the bright sun or an inspection light — tiny scratches that you can’t feel with your finger, but they distort the reflections and an overall dull finish.
Any time you touch the clear coat with anything other than a pristine microfiber cloth, you’re adding scratches.
- Flying stones, sticks, and other debris on the road
- Parking bumps, scrapes, and paint transfer
- Dragging boxes and other items from the hood or roof
- Bad cleaning - yes, cleaning can and will scratch your clear coat
- Bad detailing - similarly, improper techniques will scratch the finish
Supposedly, you can avoid any scratching of the paint. However, there are still all sorts of contaminants in the environment that will bond to the clear coat or even react to it chemically and etch the surface. Here are some of the common ones:
- Mineral deposits from hard water
- Salts used in the winter to deice roads
- Tree sap, bug splatter, bird poop
- Iron shavings from the braking system on every car
- Road tar and cement
- Paint over-spray
You can’t wash these with regular car soap. And while there are specialized chemicals to strip them down, they only work on the surface of the paint.
Examined under a microscope, the clear coat is basically a rough collection of peaks and valleys. Many of the contaminants are small enough to get in and lodge themselves in the pores. Once they settle in and solidify, they become an integral part of the clear coat and are collectively called bonded contamination.
You can clean and wash as much as you want, but you’ll never remove bonded contamination completely… unless you polish the paint.
So What is Polishing Anyway?
Car polishing is an abrasive operation that scratches away and removes a fine layer of material to level out scratches and remove bonded contamination.
The concept of polishing is very similar to sanding. However, its orders of magnitude are more delicate, using much finer abrasive products and materials.
You can polish by hand or with a machine, and there are a plethora of polishing compounds and pads on the market. In fact, often the most difficult part of the job is to pick out the correct equipment.
Using the incorrect tools, products and techniques will have an adverse effect on the finish of the vehicle, producing unsightly defects like holograms, haze, and even more scratches.
Polishing is not the be-all and end-all of the paint correction. Simply polishing the surface will not remove deep gouges and most stone chips, since they penetrate through the clear coat and affect the underlying color and primer coats. You’ll need more advanced paint correction techniques to repair these defects.
That said, polishing is always performed as a finishing operation. Polishing will practically remove 100% of bonded contamination and the vast majority of light scratches, swirl marks, orange peel, and other surface defects.
Every car, even new ones rolling out of the factory, will look better after thorough polishing.
Waxing is just applying a product on the surface of the clear coat. Traditional carnauba waxes can melt into the surface and fill in some of the scratches, therefore making them less noticeable. Car waxes also produce a glossy finish with a golden warm shine, making the vehicle that much more beautiful.
However, waxing does not cure the actual surface defects, it simply covers them out of sight. The next time you wash your car with a stronger soap, the wax will break down and reveal all the imperfections.
Other coatings like paint sealants and ceramics will not even conceal the scratches. Furthermore, contamination on top of the surface will compromise their longevity and cause them to fail prematurely.
The only way to truly repair scratches and bonded contamination is to polish the clear coat.
Preparing The Car For Polishing
As with every other detailing operation, surface prep is critical. You don’t want to smear any of the contamination and unwanted particles onto the clear coat while you’re polishing, so you have to remove them before you begin.
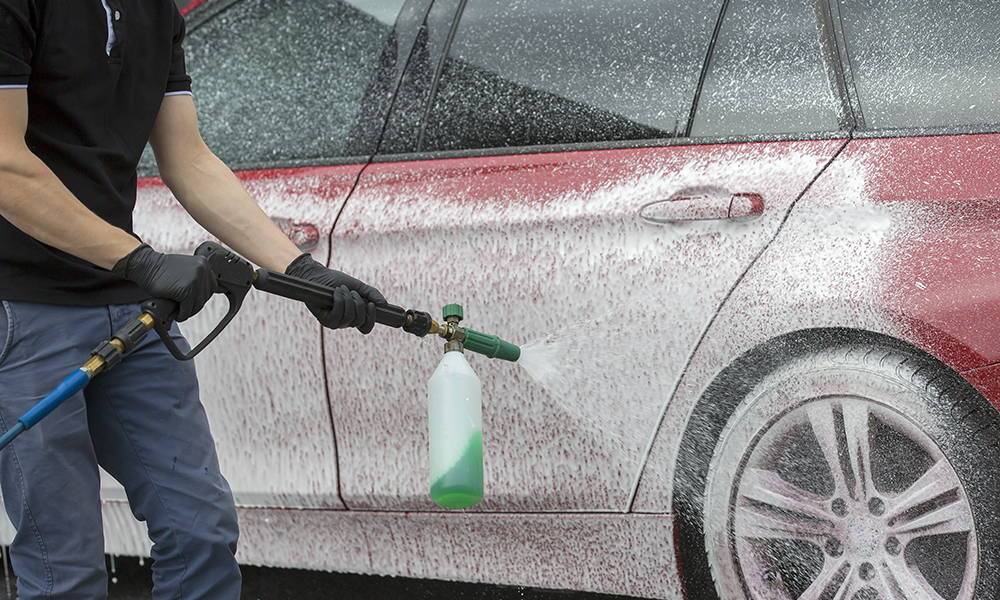
Regular wash
Just wash the vehicle with regular car soap, clean water, and a wash mitt. Use the same products and techniques you’re used to - two bucket method, foam cannon, anything works. Just remember when car washing to use a straight line, not circular motions.
Washing in circles is the main cause of swirl marks! If you’re not rinsing off your wash mitt or sponge frequently enough, or the surface is heavily soiled, tiny fragments of dirt can lodge themselves in between the vehicle’s paint and act like sandpaper, scratching the surface.
The reason swirl marks are so dreaded is that you can see them from any angle and orientation. In contrast, straight-line motions can still scratch the surface but are less noticeable and easier to remove.
If there is a ton of dirt and grime on the vehicle, you want to perform a preliminary touchless wash. Foam up the surface with a foam cannon or a pump sprayer, let it soak in and loosen the mud, then rinse the vehicle and wash again with your usual routine.
Washing will remove a big portion of the loose dust and mud from the surface. So make sure you don’t skip this step before getting down to the polishing.
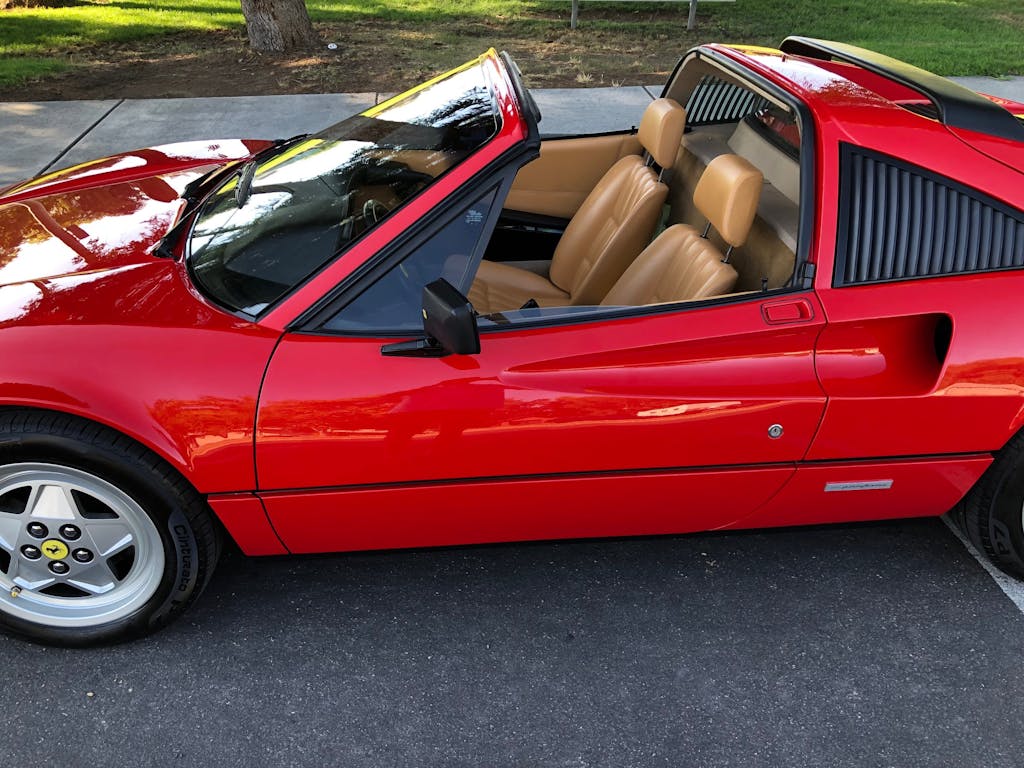
★★★★★ Kent F. (1989 Ferrari 328): "I wanted to get remove the small scratches and swirl marks on the original paint without having to repaint the car. I check with some companies that go over and restore the paint to the original color however they wanted one thousand dollars or more to do it. So I thought that I would try your product because of the success that other people using this product had.
I was very happy and impressed with the results and how it got rid of the swirl marks and scratches. It may the paint a darker color red and brought back more of the original color. I also used the clay bar solution first and then the correction compound. Then I used the Ceramic Spray to finish the car. It looks beautiful. Thank you for making such great products."
Decontamination
★★★★★ The Decon Wash Pack will strip previous coats of waxes and sealants, as well as remove surface contaminates. Your vehicle's surface is filled with contaminants. Some of these may be visible, such bug guts, bird droppings, water spots, and tree spots. And some contaminants, such as iron deposits, brake dust, and overspray may not be visible to the naked eye.
If you didn’t use Torque Detail Decon Soap in the previous step, which is an all-in-one car soap that is capable of acting as an iron remover, you must use a specialized chemical product to dissolve and remove bonded contamination. There are individual products, which attack specific contaminants like:
- Iron remover
- Tar and mineral deposit remover
- Traffic film remover
We recommend using an all-in-one decontamination soap, like Torque Detail’s Decon Car Soap. Our Decon Soap will remove a whole range of contaminants such as bug guts, bird droppings, water spots, tree spots, brake dust, and over-spray from the surface. It will also strip down any wax or sealant on the surface, which you want to remove anyway before polishing.
It’s really easy to use, just mix 4oz of product with water in a standard 5-gallon bucket. Wet down the surface and apply the solution with the included microfiber wash mitt. Scrub back and forth as long as you see fit, then rinse down the vehicle.
Examine the surface and repeat if necessary. Unless you have a heavily soiled vehicle, one pass should be enough.
Clay bar
After the decontamination wash, examine the surface with your fingers. If you feel any rough areas, you need to perform a clay bar pass.
Detailing clay is mildly abrasive, so when you glide it over the surface it will catch on bonded contaminants like mineral deposits and brake dust and shear them away. Scrubbing it back and forth will clean all the contamination that’s sticking out of the paint and leave a relatively smooth surface to work with.
Torque Detail's Clay Bar Kit that contains a ready-to-use lubricant and a reusable clay bar that’s easy to wash away.
WARNING: Always use clay bars with the appropriate clay lube or at least soapy water. Scrubbing the clay dry can scratch the surface and will do more harm than good. Check our dedicated guide on clay bars and clay bar lube before you start claying.
Hand Polishing (The Easiest Method For Beginners)
Hand polishing is the simplest and easiest method to restore some shine to your paint. It’s really straightforward, all you need are a couple of microfiber towels and some polishing compound, like our Reverse: Car Scratch Remover.
Polishing compounds usually come in paste form and contain tiny abrasive particles. As you rub them in the paint, the abrasives scratch away the topmost layer of the clear coat and level out the majority of light scratches, remove oxidation, water spots, and any contamination stuck to the surface.
Unlike washing and waxing, you polish in small circular motions, while slowly moving the pad side to side and up and down to cover the work area. Use medium pressure, overlap your strokes and work the paste until there’s barely any trace of it left on the panel. Then, wipe away with a clean microfiber towel and inspect your results. Repeat until satisfied.
Don’t try to polish the whole panel in one go - you’ll just get tired and not produce any meaningful results. Instead, separate the panel into sections and polish them one at a time.
So long as you use the appropriate products, you can’t really hurt the paint.
Hand polishing is perfect for removing light scratches and surface contamination from individual panels and areas. Deeper scratches and stone chips might prove too difficult to polish out by hand.
Hand polishing is very time-consuming and tiring. You can’t do the entire car in one go, especially if the clear coat has deteriorated significantly over the years. Unless you’re very fit, you’ll find yourself chasing after your breath after the first couple of panels.
Reverse is the newest car detailing product that easily removes scratches and swirls by hand. This car scratch remover and car paint scratch repair compound will bring your paint back to new. It's also a water spot remover and swirl remover. Make paint correction easy with this all in one formula.
- Repair car scratches, swirl marks and water spots.
- Will also remove oxidation, spider marks and paint imperfections.
- Works by hand, no fancy tools needed.
Machine Polishing
If you want to polish the entire car in a single afternoon and get amazing results, be sure and get some mechanical help.
Polishing machines and buffers seem intimidating at first, and using them incorrectly can indeed cause serious damage to the clear coat and even compromise the paint entirely.
If you’re scared to use one on your car directly, we recommend getting a couple of panels from the junkyard and testing and practicing on those first.
That said, you won’t see any respectable detailer polishing paint by hand - even when they are working with luxury sports cars and exotics.
Still, there are a few things you want to know before picking the right machine for your vehicle. They all work a little differently and will produce different results, so here’s a quick breakdown of the commonly available polishing machines.
Standard Orbit Polishing Machine (Orbital Buffers)
These machines are a direct replacement for hand polishing. The pad rotates around a circle, but stays in a fixed orientation, just like your hand when polishing in circular motions. You’ll find them for cheap in any auto care store.
They’re very safe and easy to use, however provide little cutting power, if any. Professional detailers only use them to apply products like waxes and sealants evenly and quickly across the surface. You might be able to polish out some surface defects with these pads, but not any more than polishing by hand - although a lot easier and less tiring with pads.
Random Orbit Polishing Machine
Random orbit polishing machines are more advanced. The pad still orbits in a circle, however, it also rides on a bearing, allowing it to freely spin around its own axis. As the motor powers the orbital motion, the pad rotates simply through momentum, producing a random pattern across the surface.
This buffing machine is still very safe to use, however, provides good cutting power to polish the surface and remove imperfections. Random orbit polishers are recommended for beginners!
Dual Action Polishing Machine
The dual action polisher is the go-to tool of most professional detailers. This machine forces both the orbital and the rotational motion of the pad and produces a fixed pattern.
Dual-action polishers are more aggressive and remove material faster than random orbit polishers. They are more efficient when you know what you’re doing, but can overheat the clear coat rather quickly, so beginners should beware.
Rotary Polishing Machine
A rotary machine is practically an angle grinder that spins at 1/3rd of the speed - typically up to 3000 RPM.
The pad simply rotates around its axis and thus the outer edge travels faster than the center. When not properly handled, rotary machines frequently produce hologram effects in the finish, which require a second or even third polishing stage to remove. They can overheat and burn through the clear coat quickly if kept in place.
Rotary machines are the most aggressive machines out of all and are not recommended for beginners.
Polishing Pads and Compounds Explained
Polishing pads attach via hook and loop (Velcro) to the backing plate of the polishing machine. The pads do the actual work, so choosing the right one for your polishing operation is critical to the results you’re going to achieve.
Foam Pads
Foam pads are the go-to tool for most polishing operations. They come in sets with different coarseness, depending on your needs.
- Cutting pads are used to aggressively polish the clear coat and remove scratches, defects, and contamination.
- Polishing pads remove the fine scratches left by the previous operation and produce an amazing glossy finish with crisp, clear reflections.
- Finishing pads are for applying glazes, waxes, and sealants after all the polishing is complete.
The difference here is usually in the hardness of the foam used to create the pad. The harder it is, the more cutting power it has. Some manufacturers offer textured pads, which claim to reduce friction and heat.
Microfiber pads
Microfiber pads are graded similarly to foam pads but usually lack a finishing pad. Even though it’s one of the softest fabrics there is, microfiber is still fairly abrasive when run at high speeds. Therefore, microfiber applicator pads are usually more aggressive than foam pads.
Wool pads
Wool pads are even more aggressive because the wool fiber itself is naturally abrasive. Wool pads are typically used on rotary polishers and only as a first-step operation. There are softer wool pads graded for polishing, but it’s very hard to produce a perfectly smooth finish using wool.
Wool pads are not recommended for beginners.
What About Compounds?
Polishing compounds are also graded based on their abrasive strength.
- Cutting compounds are the most aggressive and used to remove material, level out scratches, and remove contaminants from the clear coat. After using a cutting compound, it’s usually necessary to make a second pass with a lighter polishing product.
- Polishing compounds are designed for removing micro-scratches, swirl marks, holograms, and other defects left by a previous polishing operation.
- One-step compounds are used in single-stage polishing operations for removing light scratches on relatively clean and well-maintained paintwork.
Some manufacturers add additional grades of polishing compounds like heavy, medium, light, finish and even super finish.
Which Pad and Compound To Choose?
The simple truth is there is hardly any standardization, and therefore every manufacturer creates their own line of products in a manner they see fit. Compound, polish, and a whole bucket of adjectives are used interchangeably, and it’s almost impossible to draw a direct comparison between products of different manufacturers without testing them in real life on the same body panel.
Another thing to keep in mind is every vehicle manufacturer formulates their own paint. Some clear coats are harder than others and require more aggressive polishing to achieve meaningful results. The same setup on a softer paint will produce horrible defects that you have to remedy with follow-up operations.
Different pads can be combined with different polishing products to produce a wide variety of results. It’s best to stick to a single manufacturer for both the pad and compound because these will be tested together to ensure more reliable results.
There are infinite combinations of paint, pad, compound, machine settings, and techniques. There is no way to give you a recipe for 100% success.
However, there are some handy tips to help you not botch your first polishing job.
12 Pro Tips For A Successful Car Polish Job
★★★★★ "My car is slick as glass!! I put the Ceramic Spray on my Corvette Stingray and it is very slick and shiny. I should have purchased it sooner. It is a great product. It made my wheels look new. Keeps off dirt and dust." - Charlie F.
- Practice on a junkyard panel first. It’s always recommended to grab a junk panel from the local scrapyard, preferably of the same manufacturer and model as your own car, and test your products before sending it for real.
- Work inside your garage, but keep the doors open. You don’t want any dust and dirt blown on the panels as you work. But you also don’t want to breathe any fumes.
- Default to a random orbit polisher, softer pad, and a single-stage compound for your first polishing job. Two-stage polishing is a lot more complicated and requires you to go really hard on the first operation. That’s not recommended for beginners who are using their machine for the first time.
- Use softer pads and polishing compounds on dark-colored cars. Dark color paints show a lot more imperfections than light-colored paints, so go easy on them as you learn the ropes.
- Load up a dry pad with 4-5 pea-sized blobs of polish. Smear the polish in the pad by hand, and apply more until the entire face is covered. As the pad becomes saturated when polishing the first panel, you’ll need less on subsequent panels.
- Don’t apply polish on areas you’re not directly working on. The only thing that applying too much polish will accomplish is creating a big, dried-up mess for you to clean up later.
- Spread the compound first before you begin the actual polishing. Use the low-speed settings on your machine to spread the product evenly on the work area. Go to a higher setting for the actual polishing.
- Use very little pressure. Use just light pressure on a cutting operation and practically no pressure on polishing operations. The machine works best when free-spinning on the surface. Bogging it down will only cause it to work poorly and install scratches in the finish.
- Keep the pad parallel to the panel surface. Especially on rotary machines, the outer edge of the pad travels way faster and carries less product. Keeping the pad tilted will aggressively polish the areas under the edge and can quickly overheat and ruin the clear coat. On complex surfaces like the bumper, mirrors, various louvers, and crevices, you almost have no choice but to angle the pad. Use your good judgment to position the machine and control the settings accordingly.
- Move the pad in straight overlapping motions. The pad already rotates, so there’s no gain in moving about in circles. Instead, use side to side and up and down motions, overlapping each stroke by 50% to evenly cover the work area.
- Beware of overheating the surface. Polishing in the same spot will quickly build up heat through friction and cause a whole range of damage - paint swelling, holograms, scratches - which may not be immediately obvious, but will show after the paint cools down. Always keep the pad moving at least a couple of inches per second and don’t hover around the same spot.
- Beware of reducing the clear coat thickness to a dangerous level. Any polishing operation will remove a fine layer of the clear coat on your car. You only have so much to work with and if you take it all down, it will fail and expose the coats underneath. Use a paint depth gauge to measure the thickness of the clear coat and stay away from dangerously thin areas.
Protect Your Freshly Polished Paint
Does polishing seem like a whole lot of hassle? We won’t lie, there is some work to it.
But don’t let that put you off, as it’s well worth the time and effort once you finally see the sleek and stunning end result. If you did your job right, you could almost shave in the reflection of your hood.
Be wary of taking the car out right away though. This will see the pristine paint tarnish in a couple of weeks and the finish will grow dull once more. After all that hard work, it’d be a real shame.
If you want to keep your polished paint looking immaculate to the eye, you need to protect it with a top coat. Of course, the world of coatings is no less diverse. There are waxes, paint sealants, and ceramic coatings.
Waxes only last a couple of months or a couple of washes at best. Paint sealants offer good protection and last up to 6 months on regularly driven vehicles. Torque Detail’s Mirror Shine is a hybrid product that combines the aesthetics of waxes with the protection and longevity of paint sealants.
By far, you’ll get the best protection and durability from a traditional liquid nano-ceramic coating. Once the ceramic cures, it hardens into a glass layer on top of the surface, which will protect the paint from pretty much everything except mechanical damage. That said, they are somewhat cumbersome to apply with no experience and you only have one chance to do it right. If you mess it up, you can only remove it through aggressive polishing with a rotary machine and heavy cut pad and compound.
Torque Detail has formulated its own spray ceramic coating - Ceramic Spray. It applies like a paint sealant - just spray on the surface and wipe with a microfiber towel. The key ingredient is the ceramic particles, which give the product increased protection against UV, dirt, brake dust, water spots, acidic contamination, and more. Ceramic Spray makes the body panels highly hydrophobic, repelling water and remaining clean for longer.
I help run the day to day for America's Number #1 Car Wax Mirror Shine by Torque Detail. As a Certified Detailer by the International Detailing Association, I use that knowledge to help create products that get professional grade results with super simple application techniques.