Ceramic coating has been a hype term among the detailing industry for some time now. It seems like every detailer and their friend are trying to sell you a coating service, and every manufacturer wants to sell you a bottle of DIY coating. So as a consumer, what should you do to properly protect your vehicle and maximize your purchase value? Should you spend thousands of dollars on a professional detailer, or should you try to apply a DIY ceramic coating in hopes of saving money and hopefully getting the same results?
In order to answer these questions, we first have to educate ourselves on what ceramic coating is and why, in most cases, it outperforms every other form of protection on the market. After that, we’ll take you through a step-by-step guide on how to pick the right DIY ceramic coating for your vehicle, as well as how to properly apply the DIY coating to get the best results!
★★★★★ "My car is slick as glass!! I put the Ceramic Spray on my Corvette Stingray and it is very slick and shiny. I should have purchased it sooner. It is a great product. It made my wheels look new. Keeps off dirt and dust." - Charlie F.
What Are Ceramic Coatings?
Ceramic coatings are the highest grade of chemically-applied protection and gloss enhancement for your vehicle. Unlike traditional waxes and sealants, which are just films that sit on the surface of a vehicle, true ceramic coatings create a semi-permanent protective barrier that bonds with your vehicle's surface, providing unmatched durability, protection, gloss, and self-cleaning abilities. Most ceramic coatings on the market are chemically based on SIO2, otherwise known as silicon dioxide or ceramic. SIO2 is the chemical compound that provides the foundational structure found in most coatings. It also provides amazing durability, gloss, and shine, along with a thick physical layer of protection that in most cases can be measured by a tool such as a paint thickness gauge.
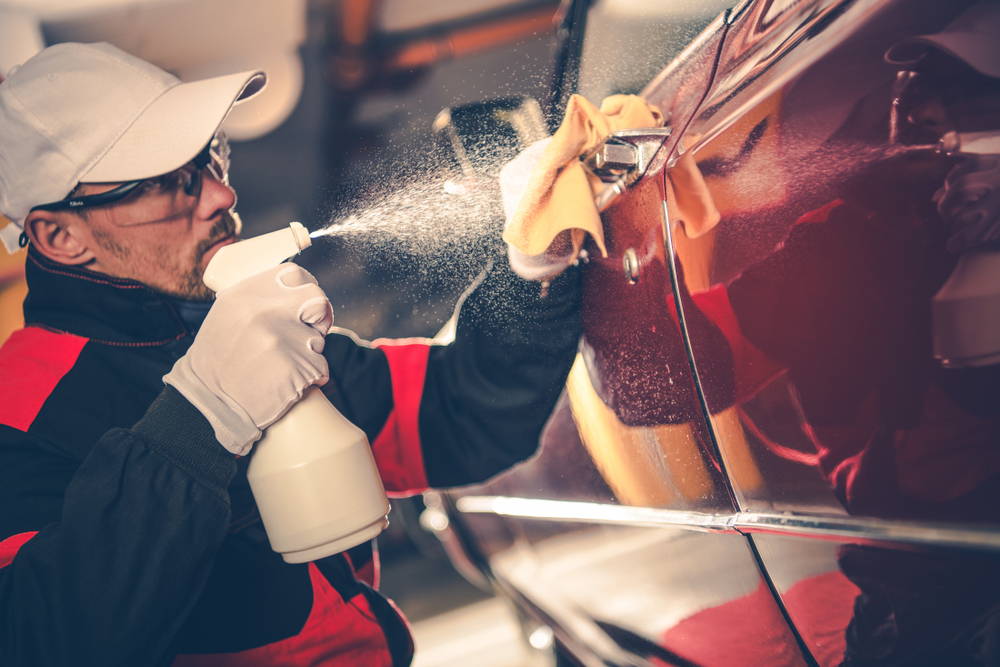
Ceramic Spray - An Auto-Detailing Must-Have
"All I can say is Holy Smokes! It reflects like glass and repels water like it's a job! So far I love it." - Ramsey H."
Paint coatings can also be enhanced - in other words, chemically combined - with compounds such as TIO2 (titanium dioxide) or polymer-based forms of gloss and slickness enhancers. Furthermore, many coatings on the market also have solvent-based transfer fluids, allowing the user to more easily apply a coating to the surface. All of these compounds and chemical solutions make up many of the most popular ceramic coatings on the market such as CarPro Cquartz, Ceramic Pro, and many more.
When ceramic coatings are applied to your vehicle’s painted surface, it chemically bonds to your clear coat, allowing for that long-lasting protection and shine. Taking this into consideration, coatings are at times more difficult to apply compared to waxes and sealants, and if a mistake occurs, it can become permanent if not addressed in a timely manner. However, with constant advancements in car coating technology, there are far more easy-to-use options that provide you similar results to professional-grade coatings on the market. Coatings are also available for glass, plastic, leather, vinyl, and pretty much any other surface found on your vehicle.
What Are Waxes And Sealants And Why Are Ceramic Coatings Different?
Now that we know what ceramic coatings are made of, we can compare them to waxes and polymer sealants. It's important to understand the differences between the three to gain a complete understanding of why ceramic coatings provide much greater gloss and durability compared to other forms of protection on the market.
Starting with the oldest form of protection on the market, natural wax is one of the most traditional products and is very easy to buy from most physical and online stores. Natural waxes such as carnauba and beeswax-based ones provide a deep and rich gloss and shine to your vehicle. These waxes also provide a great water beading effect. Unfortunately, some cons of natural wax products include very limited protection and durability. They are very heat-sensitive and collect dust more easily than other forms of protection on the market. Your traditional paste or liquid wax will only last you a few weeks to a couple of months at best. So, compared to the years worth of protection that ceramic coatings provide, waxes have become almost obsolete for many professional detailers and enthusiasts.
Polymer waxes, sometimes referred to as sealants, are very easy to use due to no clumping or residue buildup like natural waxes. Polymer waxes or sealants provide longer-lasting protection, have less residue and greater anti-dusting properties, and give your vehicle a great shine! They can leave your vehicle with anywhere from 6 to 12 months worth of protection rather than just a few weeks! Not only that, but sealants are also super versatile and can be used on pretty much all areas of the vehicle exterior such as glass, paint, plastics, and wheels. Some sealants can even be used on the inside of cars, adding protection to areas such as dashboards, leather seats, and vinyl surfaces.
Finally, we have hybrid polymer waxes or sealants. Hybrid waxes are a mixture of both natural and polymer waxes in one product. You can get the depth and filling ability of a natural wax but also the shine and longer-lasting protection of a polymer sealant!
Not All Car Coatings Are The Same
Just like any other car detailing product, there are hundreds of coating options available on the market, and not all are created alike, so we’ll now take you through what the differences are and what the best option would be for you and your vehicle.
Professional-Grade Car Ceramic Coatings:
Professional-grade car ceramic paint coatings are the products your local professional detailer offer for your vehicle. These coatings can only be advertised and applied by trained detailers who have been granted the proper certification by the coating manufacturer to not only properly apply the ceramic coating, but also to maintain it. Most of these professional-grade car ceramic paint coatings are provided with warranties as well, ensuring customer satisfaction for years to come.
Not All Detailers Are The Same
Just like anything else, not every detailer is the same. Most take pride in their work and offer their services with quality and integrity in mind. However, some “professional” detailers cut corners in the coating prep and application process, so make sure to vet your detailer prior to paying for their services. Copies of proper and updated certifications should be available by request from your detailer, along with other certifications such as the International Detailing Association Skill Validated and Certified Detailer Accreditations.
How Long Do Professional-Grade Car Ceramic Coatings Last?
Professional-grade ceramic coatings are some of the most difficult to apply on a vehicle's surface, but they will provide your vehicle the highest and longest-lasting protection on the market. Depending on your detailer and the manufacture of coating they apply, it can provide durability that ranges anywhere from 5 years on the low end all the way up to 10+ years. They are also very expensive, sometimes costing $500 per ceramic coating kit, plus thousands of dollars in continual training, certification, and monthly subscription expenses.
Entry-Level DIY Ceramic Coating Kits
Unlike professional-grade ceramic coatings, entry-level coatings can be purchased by anyone! You won't be able to find them at your local auto shops or big box stores, but they are available on all auto detailing websites and on Amazon. These products are far more affordable compared to professional-grade car nano-ceramic coatings, typically costing $50 to $100 per ceramic coating kit. You also have a wide variety of brand options from many reputable auto detailing chemical manufacturers.
Can Anyone Use DIY Ceramic Coating Kits?
Because these entry-level nano-ceramic coatings are DIY coatings, you as an auto detailing enthusiast can apply them with the proper steps and preparation. They are far easier and more forgiving compared to professional-grade ceramic coatings, but still require some detailing experience prior to application.
How Long Do Entry-Level DIY Ceramic Coatings Last?
Most entry-level ceramic coatings provide 1 to 3 years worth of protection, which is far less than professional ceramic coatings, but far greater durability, gloss, and protection compared to waxes and sealants.
Sprayable DIY Ceramic Coating Kits:
Even entry-level DIY coatings may not be your cup of tea, as they are more difficult to apply compared to traditional forms of protection and still cost a substantial amount of money for a small amount of product. Your next option would be a sprayable DIY nano-polymer ceramic coating kit! Unlike your traditional ceramic coatings, which are SIO2-based, sprayable DIY ceramic coatings are polymer-based forms of protection enhanced with nano SIO2 ceramic particles. These particles allow for greater and longer-lasting protection, gloss, and shine to the vehicle.
Ceramic Spray - An Auto-Detailing Must-Have
"All I can say is Holy Smokes! It reflects like glass and repels water like it's a job! So far I love it." - Ramsey H."
How Easy Are Sprayable DIY Nano-Ceramic Coatings To Use?
Because sprayable DIY nano-ceramic coatings are polymer-based and have a lower SIO2 content, they can usually be applied just like a spray-on wax or sealant! This means they're super easy to use and far more affordable compared to traditional ceramic coatings. Sprayable coatings can usually be found online or at your local auto store for around $30. They’re also extremely versatile and can be used on almost any exterior surface of your vehicle, unlike traditional ceramic coatings which require a specific coating for each different surface type.
How Long Do Sprayable DIY Nano-Ceramic Coatings Last?
Sprayable DIY nano-ceramic coatings can last anywhere from 8 months to a year in terms of protection, gloss, and shine. However, please remember that because they have a lower SIO2 content, sprayable coating options don’t provide the thickness or same durability as professional-grade or traditional entry-level ceramic coatings. Still, because they’re so easy to use and value-oriented they can be reapplied when needed, providing your vehicle similar amounts of protection compared to entry-level ceramic coating options.
So What Is The Best Ceramic Coating?
I know we just went through a lot of complex information regarding ceramic coatings, so now you’re probably wondering what the best ceramic coating is on the market. However, the question you should be asking is, what’s the best ceramic coating for you and your vehicle’s specific needs? If you’re a car detailing enthusiast looking for durable protection and have the know-how to go through our step-by-step process and apply an entry-level ceramic coating kit, go for it! On the other hand, if you’ve never detailed your car before, you might want to try out a sprayable coating or even go to a professional detailer. Sprayable coatings don’t require as much prep as other coatings on the market - all you need is a quality hand wash and clay bar service and you’ll be ready to coat your vehicle!
How To Properly Apply An Entry-Level Ceramic Coating
Now that we have a complete understanding of what ceramic coatings are and the differences between professional, entry-level DIY, and sprayable coatings, we can start the step-by-step process for your coating application.
First, you have to properly prepare the vehicle with an exterior detail! To learn how to detail your vehicle like a professional, check out our “How To Detail A Car: Detail Your Car Like A Pro Detailer!” article. You need to properly wash, decontaminate, and polish your vehicle prior to the coating application, so please make sure to perform these steps found in our previous article for the best and longest-lasting results! After you’ve properly detailed your vehicle, follow our step-by-step process below on how to apply an entry-level DIY and a sprayable DIY ceramic coating.
Step 1) Prepare Your Ceramic Coating Kit
After you’ve completely detailed your vehicle, you can go ahead and prepare your ceramic coating kit. Most ceramic coatings come in a kit format, so you want to make sure you take everything out of the kit and go over the manufacturing instructions. After preparing your bottle of ceramic coating, your applicator pad, and two new high-quality microfiber towels, you’re ready to start your coating application.
Step 2) Clean The Paint With A Paint Prep Solution
Even after detailing your vehicle with a hand wash, clay bar, and polish, you’re going to have to prep your paint with a cleaning solvent. These cleaning solvents will remove any polish or oils on your paint, leaving you a perfectly clean surface for your coating to bond to.
Step 3) Prime Your Applicator Pad
Open your new bottle of ceramic coating and evenly apply a liberal amount of solution on your applicator pad - about 10 drops. This process is called priming, and you should only do this on a brand new applicator pad to make sure there’s more than enough coating properly covering the applicator. After you prime the applicator, you’ll only need 4 to 5 drops of solution after each section you work on.
Step 4) Apply The Ceramic Coating
Working in small 3x3 sections, apply your coating with your applicator pad in straight lines, overlapping cross-hatch motions. Go up and down once, then crosshatch going left to right, making sure you cover the whole 3x3 section.
Step 5) Wait 30 To 60 Seconds
Depending on the coating you're using, you will have to wait 30 to 60 seconds for the ceramic to properly bond to the surface. You should notice a rainbowing effect as the coating bonds to the clearcoat.
Step 6) Level & Buff Off
When you hit the 30-second mark, get your first towel ready - this will be your leveling towel. Lightly wipe the coated area with your leveling towel with little to no pressure, as this first towel is purely for leveling off the coating. After that, grab your second towel and then, in straight line motions, buff off the rest of the excess coating and transfer solution until no more remaining residue is visible.
Step 7) Inspect & Repeat
After each section, make sure to inspect your work just in case you missed any areas. Also remember to flip your towels to a fresh side after every other panel to ensure you are able to remove all excess coating from the vehicle.
Step 8) Final Inspection
After completing the vehicle, give it a final lookover, making sure you didn't leave any excess coating. When leftover excess coating cures, it will leave a high spot on the paint. High spots look like an uneven paint surface, and the only way to remove them after it completely cures is to polish it off or, in extreme situations, sand them off the surface.
Step 9) Let The Coating Cure
Depending on your coating’s instructions, let the coating cure indoors for 24 to 48 hours. This means avoiding driving the vehicle and any moisture such as water or extreme humidity.
How To Properly Apply A Sprayable Nano-Ceramic Coating
Step 1) Prepare Your Sprayable Nano-Ceramic Coating
After you’ve completely detailed your vehicle, you can go ahead and prepare your sprayable ceramic coating. Make sure to have at least two new quality microfiber towels, and also to shake your coating bottle prior to using the product. After preparing your bottle of ceramic coating and two new high-quality microfiber towels, you’re ready to start your coating application.
Step 2) Clean The Paint With A Paint Prep Solution
Even after detailing your vehicle with a hand wash, clay bar, and polish, you’re going to have to prep your paint with a cleaning solvent. These cleaning solvents will remove any polish or oils on your paint, leaving you a perfectly clean surface for your coating to bond to. You can find these products online under ceramic coating paint prep solutions, or check out our favorites here.
Step 3) Prime Your Application Towel
Spray your applicator towel once or twice to prime the surface of the towel.
Step 4) Apply The Ceramic Coating
Working in small 4x4 sections, spray your coating on the surface of the vehicle and then, in straight line motions, buff in the solution, making sure to get full and even coverage for each section.
Step 5) Buff Off To A High Gloss Shine
After applying the coating, take your second towel and buff off all residue to a high gloss shine.
Step 6) Inspect & Repeat
After each section, make sure to inspect your work just in case you missed any areas. Also remember to flip your towels to a fresh side after every other panel to ensure you’re able to remove all excess coating from the vehicle.
Step 7) Final Inspection
After completing the vehicle, give it a final lookover, making sure you didn't leave any excess coating. When leftover excess coating cures, it will leave a high spot on the paint. You want to make sure to remove all excess coating residue to avoid high spots.
Step 8) Let The Coating Cure
Depending on your coatings instructions, let the coating cure indoors for 24 to 48 hours. This means avoiding driving the vehicle and any moisture such as water or extreme humidity.
How To Properly Maintain A Ceramic Coated Vehicle:
Even though your vehicle is ceramic coated, you still need to maintain it with proper wash methods and quality wash products. You’ll notice that your car stays cleaner for longer and is a lot easier to clean as well! We recommend you wash your coated vehicle at least once a week for optimal ceramic coating performance, but many individuals wash their cars when needed and still get great results and durability from their coatings. However, the most important part is how you wash your car. You want to make sure you completely avoid automatic car washes, as these use harsh chemicals and materials that will weaken and scratch your coating over time!
How To Wash Your Car The Right Way
The pre-wash stage is great for removing large buildup of surface contamination from your vehicle prior to you bringing it in contact with your wash mitt. The more dirt you can remove from your car without physically touching it, the safer your wash process becomes. If you have a foam cannon, great! This is the time to make your driveway look like a snow apocalypse! Just take a few ounces of your car soap and mix it with water in your foam cannon reservoir. Then proceed to foam down your vehicle with your foam cannon and let the foam solution dwell on the surface for a few moments. If you notice it drying quickly, continue to foam it down until the solution has dwelled on the surface for a few minutes before rinsing it off.
The two-bucket wash method is one of the best ways to wash your vehicle! Every time you touch your paint with your wash mitt, you pick up dirt. When dirt accumulates, it acts like sandpaper and scratches your paint! To minimize this, we use the two-bucket wash method. Fill both buckets with fresh water, then take your first bucket and apply the recommended amount of car soap according to the directions on the back of the bottle. This will be your wash bucket. The second bucket will be left with just water and will be used for rinsing your wash mitt.
Start washing your car from top to bottom in straight line motions, making sure to rinse you wash mitt in your rinse bucket and getting more soap solution from your wash bucket after each panel.
Next, it’s time to dry the car! A high-quality drying towel is one of the most popular drying methods in the industry. You also have the option to blow-dry your vehicle, although for this, you're going to need a strong blower that can cost upward of $300! A quality drying towel can be found online for as little as $20 and will do a great job drying your car after your wash. Take your towel, fold it until it's comfortable to maneuver around your vehicle, and lightly drag it across all exterior surfaces, making sure to pick up as much water as possible. Repeat this process until the vehicle is completely dry.
Sometimes, your ceramic coating can grow to look a little dull or maybe just not as slick as usual. Don't worry, the coating is still there protecting your paint, but you might need to restore the top hydrophobic layer of the coating. This can be easily done using a ceramic topper after the wash process. All you have to do is lightly mist the ceramic topper on all ceramic coated surfaces, then lightly buff off to a high gloss shine with a new quality microfiber towel!
Ceramic Spray - An Auto-Detailing Must-Have
"All I can say is Holy Smokes! It reflects like glass and repels water like it's a job! So far I love it." - Ramsey H."
Zaia is the founder of CarNewba Detailing, a premium detailer shop based out of Arizona. Trained by world renowned detailers, Zaia has over 6 years worth of experience and 12+ detailing certifications ranging from the International Detailing Association CD & SV to all 6 Detailing Success Certifications.