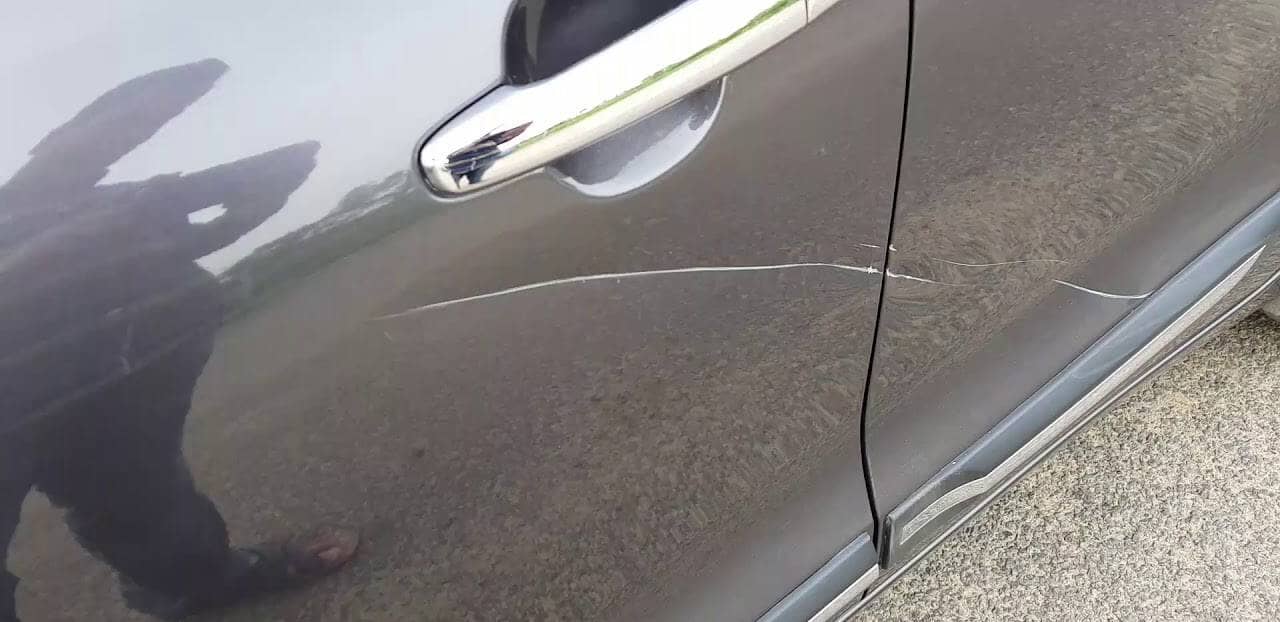
Ever walk out to your car in the morning with the sun up and notice that your paint has a type of spider webbing effect? Welp, I know I have!
That spider web effect is typically referred to as swirl marks - a very common paint defect that every car owner encounters sooner or later. I remember my first car was a black 2006 Saab 9-3 Aero and was covered in swirl marks. (Speaking about black cars, you've gotta check out our guide to keeping black cars clean!)
I spent a whole afternoon using the step-by-step process below and after I was done, my Saab looked brand new! So, let's go over the details of swirl marks and how to properly remove them from your car's paint.
Reverse is the newest car detailing product that easily removes scratches and swirls by hand. This car scratch remover and car paint scratch repair compound will bring your paint back to new. It's also a water spot remover and swirl remover. Make paint correction easy with this all in one formula.
- Repair car scratches, swirl marks and water spots.
- Will also remove oxidation, spider marks and paint imperfections.
- Works by hand, no fancy tools needed.
- Contains no fillers, silicone or wax.
- No hazing, no streaking.
- Product contains 4oz of all-in-one paint correction compound.
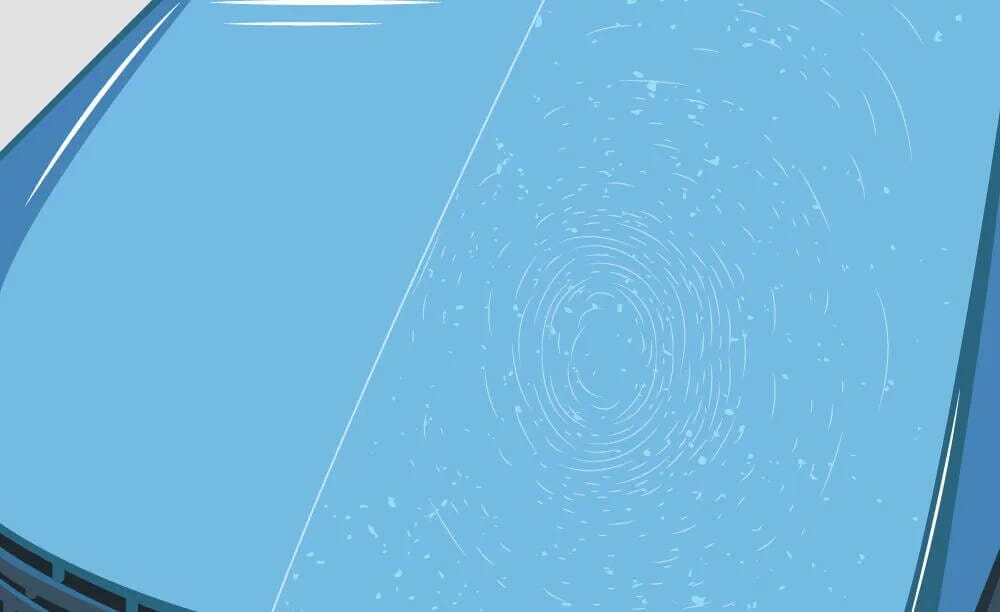
What Are Swirl Marks?
Swirl marks are a super common defect on many cars, and the result of an accumulation of thousands upon thousands of micro-scratches that come together to cause that swirling effect on your paint. Not only does it look strange, but swirl marks also diminish your paint’s gloss and shine, making it look dull and unimpressive.
What Causes Swirl Marks?
Swirl Marks can be caused by many different things, but to keep things simple, they’re caused by improper touching of your painted surfaces.
It usually affects the clear coat layer. This can be anything such as washing your car improperly, using automatic car washes, or using something like a California duster. Over time, each of these actions causes friction on the surface, leaving behind micro-scratches. As time goes by, these micro-scratches multiply into the thousands and accumulate in different directions, causing the swirl mark effect.
We find that vehicles that go to automatic car washes on a regular basis develop a lot of swirl marks, causing the paint to look unhealthy and dull. If you have a new car and you start developing swirl marks, you or the automatic wash is likely doing a poor job of washing the paint.
How to Remove Swirl Marks By Hand - Try This First
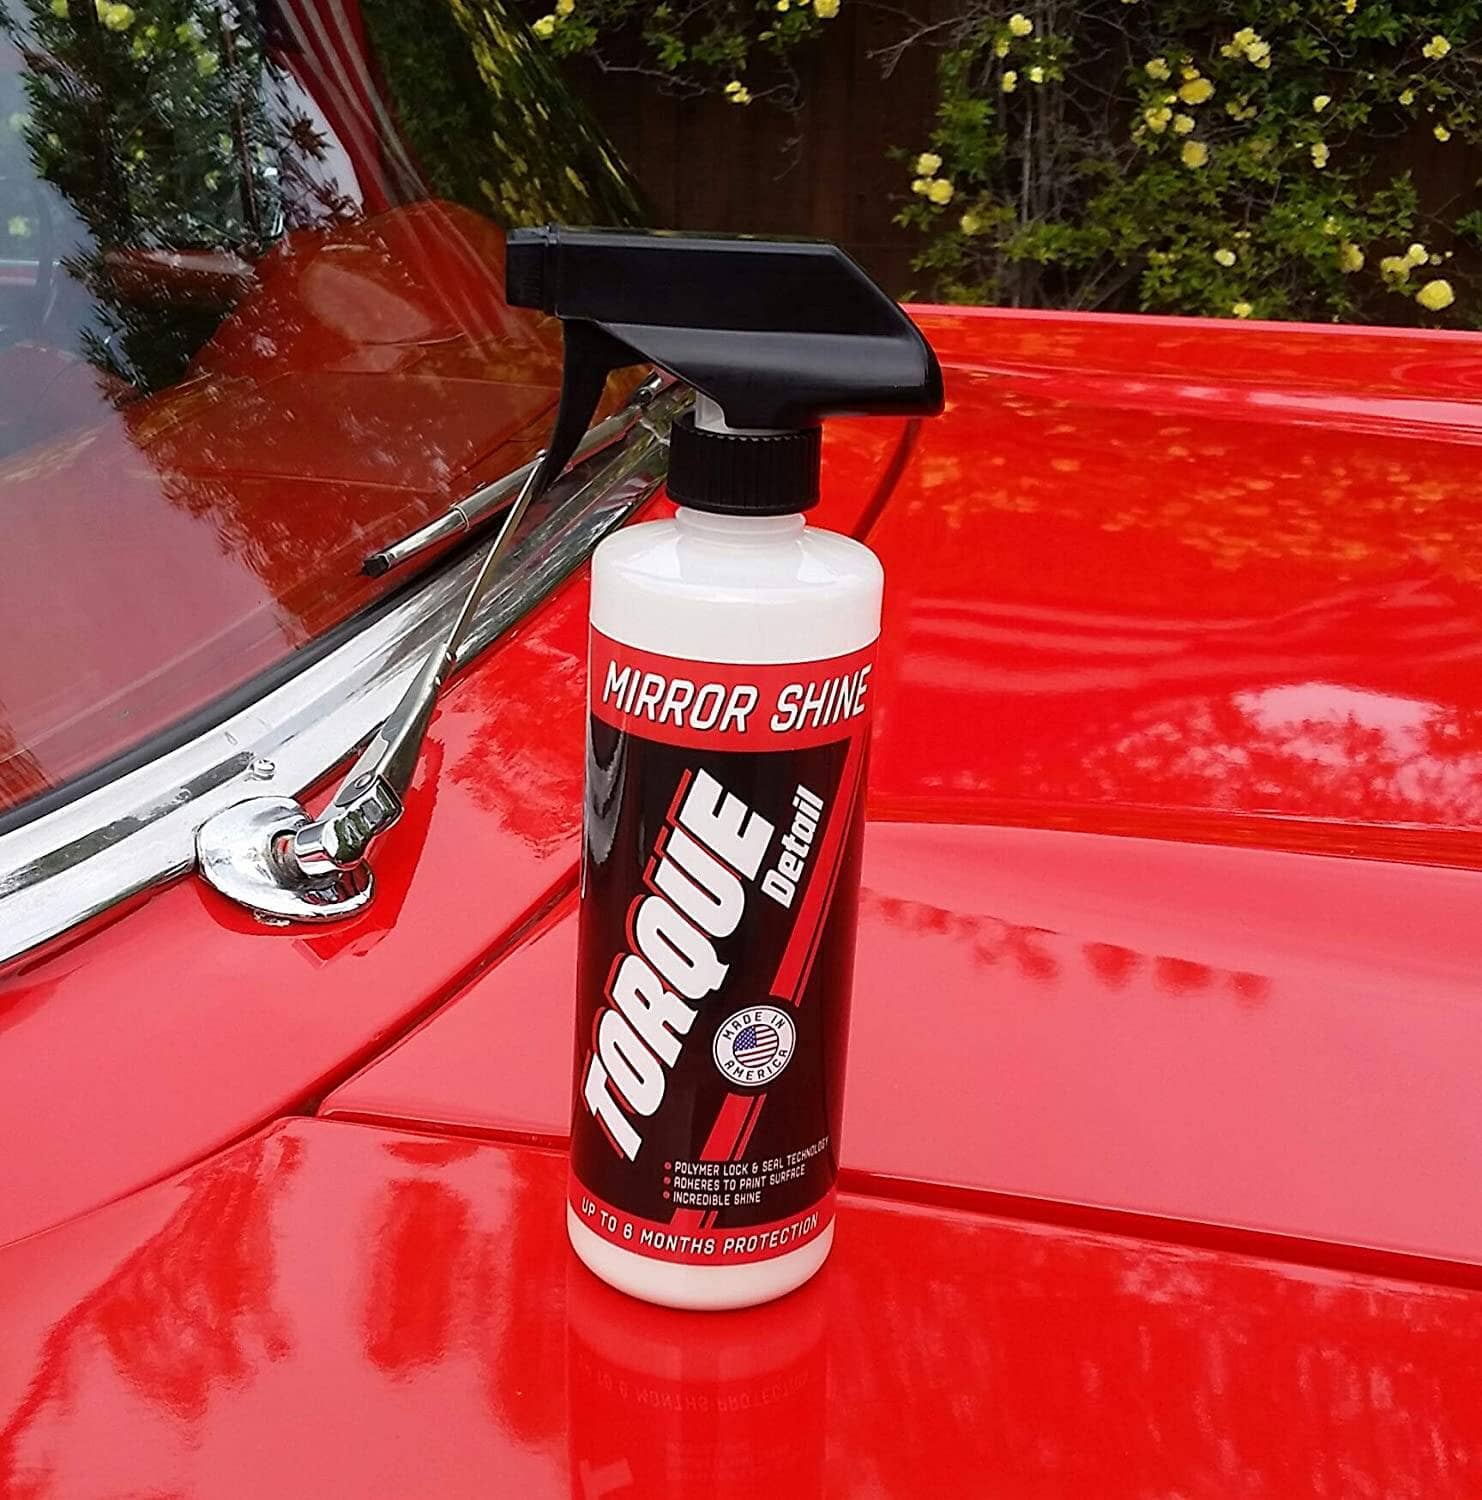
If you have a light amount of swirl marks or maybe a single panel that was wiped down incorrectly, Torque Detail Reverse Scratch Remover is a great, easy-to-use scratch and swirl remover that provides professional results safely. It uses high-tech diminishing abrasives, allowing you to level scratches and swirl marks while providing a haze-free and glossy finish.
Material List
- Reverse: Car Scratch Remover & Swirl Mark Repair
- Torque Detail Full Decon Kit - Great value! Includes all you need to decontaminate your vehicle.
- Microfiber towels
- 2 buckets - for the two bucket wash method. Optionally pick up some grit guards as well for extra safety as you wash.
Step 1.) Wash Your Car
You have to make sure you wash your vehicle prior to polishing, since if dirt and grime get stuck in your applicator pad, you’ll only apply more scratches into your paint. So, using some quality car soap and the two-bucket wash method, thoroughly wash and dry the vehicle. Start from the top of your vehicle and work your way down panel by panel. Make sure that after each panel, you rinse out your wash mitt in your rinse bucket and then apply more soap - this will ensure maximum cleaning ability and also prevent you from dragging dirt around on your car. After you’re done washing, rinse off all the excess soap and dirt, then dry the vehicle with a quality microfiber towel.
If you are using Torque Detail's Decon Soap, it is able to remove most types of contamination (including iron fallout) which will make the next step a lot easier.
Step 2.) Clay & Decontaminate Vehicle
Most cars have a lot of iron fallout from contamination such as brake dust and construction sites. Removing this iron contamination is a must in order to move onto the next step. Using a quality iron fallout remover, spray all painted surfaces of your car in a shaded area and let it sit for a few minutes. Torque Detail Decon Soap is great at this. If you used it in the previous step, you should be set! You’ll notice purple spots around the vehicle after a few minutes - this is the iron contamination breaking down. After 5 minutes or so, rinse the whole vehicle and then completely dry it off with a microfiber towel.
The next part is claying your vehicle. Now when should you clay bar a vehicle? Well, a quick test is rubbing your hand on your car's paint (dry it first). If you feel bumps, there are likely still paint contaminates and you should clay. If it feels completely smooth, you can skip the clay process.
You have to remove this embedded contamination or just like the surface dirt, it will get caught in your applicator pad, causing yet more damage to your paint. Take your clay pad and spray some clay lube (included in the Full Decon Kit) on both the clay and the surface of the vehicle.
Work in 2x2 or 3x3 sections and lightly scrub the surface in up and down motions with the clay. You'll notice the surface becoming smoother after each pass, and you might even be able to hear the difference! After you feel little to no contamination, buff off your quick detailer or clay lubrication. If you're using a clay bar, you’ll physically see the contamination in the clay, so make sure to flex the clay to a fresh side as needed. If you’re using a clay mitt, make sure to rinse the mitt after each panel to remove the contamination from it. Continue this process on both the paint and glass surfaces of your car until complete.
Step 3.) Polish Your Car
After your car is clean and dry, grab a new microfiber towel or applicator pad. Apply a few drops of Reverse Scratch Remover and buff the area. Work in circular overlapping motions in a 3x3 area with light to medium pressure. With a new microfiber towel, wipe off the excess residue to reveal a swirl-free, high-gloss shine! Repeat this process around the vehicle panel by panel until complete.
How To Remove Tough Swirl Marks
Some vehicles' swirl marks are so heavy that it's almost impossible to remove by hand, and that's where machine polishing comes in. Years ago, detailers would use high-speed rotary buffers to remove swirl marks, but sadly, rotary buffers were hard to use and if used incorrectly, could damage your paint even more. However, with the advancements of machine polishing technology, we now have easy-to-use DA Polishers. These tools are simple to use and provide amazing pro results in half the time compared to hand polishing.
Material List
- Reverse: Car Scratch Remover & Swirl Mark Repair
- Ceramic Spray
- Decon Soap
- Microfiber towels
- 2 buckets
- Applicator pad
- Clay bar
- Machine DA polisher
- Foam polishing pad
Step 1.) Wash Your Car
Just like polishing by hand, you need to make sure to wash your vehicle prior to machine polishing - if dirt and grime get stuck in your foam pad, you will apply more scratches to your paint, this time at an accelerated rate. So, using some quality car soap and the two-bucket wash method, thoroughly wash and dry the vehicle. Start from the top of your vehicle and work your way down panel by panel. Make sure that after each panel, you rinse out your wash mitt in your rinse bucket and then apply more soap. This will ensure maximum cleaning ability and also prevent you from dragging dirt around on your car. After you’re done washing, rinse off all the excess soap and dirt, then dry with a quality microfiber towel.
Step 2.) Iron Fallout Remover
Most cars have a lot of iron fallout from contamination such as brake dust and construction sites. Removing this iron contamination is a must in order to move onto the next step. Using a quality iron fallout remover, spray all painted surfaces of your car in a shaded area and let it sit for a few minutes. You’ll notice purple spots around the vehicle after a few minutes - this is the iron contamination breaking down. After 5 minutes or so, rinse the whole vehicle and then completely dry it off with a microfiber towel.
Once again, if you're using Torque Detail Decon Soap, it will remove iron fallout so you do not need an additional product.
Step 3.) Clay Your Car
After you wash and dry your car, feel the paint with the back of your fingers. Does it feel rough? If so, it means you have embedded contamination in your paint. You have to remove this embedded contamination or just like the surface dirt, it will get caught in your applicator pad, causing more damage to your paint. Take your clay bar or clay mitt and spray some quick detailer or dedicated clay lube on both the clay and surface of the vehicle. Work in 2x2 or 3x3 sections and lightly scrub the surface in up and down motions with the clay. You'll notice the surface becoming smoother after each pass, and you might even be able to hear the difference! After you feel little to no contamination, buff off your quick detailer or clay lubrication. If you're using a clay bar, you’ll physically see the contamination in the clay, so make sure to flex the clay to a fresh side as needed. If you’re using a clay mitt, make sure to rinse the mitt after each panel to remove the contamination from it. Continue this process on both the paint and glass surfaces of your car until complete.
Step 4.) Inspect Your Paint
Using the sun or a flashlight, inspect the condition of your paint. If it looks really dull and has layers of swirl marks, you’ll probably need to compound and polish the surface. This process is referred to as a two-step one. If your paint has a light amount of swirl marks, you might only need to polish it, so this process is referred to as a one-step one.
Step 5.) Prep Your Polisher And Pad
Grab your polisher and make sure to center your foam polishing pad on the polisher’s backing plate. If your pad is not centered on the backing plate, it will throw off your machine, making it more difficult to remove the swirl marks. After that, prime your polishing pad by applying 6 pea-sized drops of Torque Detail Reverse Scratch Remover or a comparable car polish.
Step 6.) Start Polishing
Set your polisher at low speed and spread the polish around a 3x3 section, then increase the speed of the polisher to a comfortable setting. Keep buffing the polish in slow and controlled overlapping motions, making sure not to apply too much pressure. When the polish becomes transparent, stop the machine and check out your results with a flashlight. If you still have swirl marks left over, you might need a more aggressive pad and polish. If this is the case, switch your pad over to a heavier-cut pad and your polish to a heavy-cut compound. Start step three again but this time with your new compound and pad, and check out your results again afterward. If the swirl marks are removed, move on to the next section, making sure to apply 2 to 3 pea-sized drops after every pass. If you used a compound and heavy-cut polishing pad to remove the swirl marks, you're probably going to have to finish the surface with a lighter cut polish. This process is referred to as a two-step one. After completely compounding the car, grab your finishing polish and finishing foam pad and repeat step three until the vehicle is complete.
Step 7.) Protect Your Finished Product
Now that you have a glossy and swirl-free finish, let’s protect it with a quality sealant or ceramic coating like Torque Detail Ceramic Spray. Ceramic spray will add more gloss and shine to your paint while protecting it from the environment. It's super simple to use - just apply a small amount to a 3x3 section, buff on, then buff off. That easy! Continue the process around the whole car and enjoy your swirl-free paint!
How Can You Prevent Swirl Marks In The Future?
As previously stated, swirl marks are most common on vehicles that are taken to automatic car washes, so the best thing to do to avoid swirl marks is to avoid the automatic car wash and regularly maintain your vehicle with quality hand washes. Also avoid touching your vehicle while dry - for example, dusting it off with a car duster is a big no-no. Little things like this can prevent swirl marks on your car's paint.
- "My Alfa Romeo Giulia’s deep red never looked so good. This is an excellent product! The best!"
- "We all know how hard it is to maintain a black car; This is the answer, I did my car and didn't take much of the compound and then a touch of mirror shine it looked better than new and my baby is a 2015."
- "Love my results after using Torque Scratch Remover."
Summary
So remember, if your car has swirl marks, don't stress out about it! Every car will encounter some level of swirl marks over time. If polishing by hand, just remember to take your time and use a quality polish like Torque Detail Reverse Scratch Remover, which will speed up your process and give you better results. If polishing by machine, make sure to perform a test spot to see if a one-step or two-step polishing process is required. And of course, always remember to protect your swirl-free finish with a quality wax, sealant, or ceramic coating! We hope that you have enjoyed this car detailing guide.
Zaia is the founder of CarNewba Detailing, a premium detailer shop based out of Arizona. Trained by world renowned detailers, Zaia has over 6 years worth of experience and 12+ detailing certifications ranging from the International Detailing Association CD & SV to all 6 Detailing Success Certifications.