The steering wheel is the most important part of your interior. Yes, even in your self-driving Tesla or ‘all bells and whistles’ Porsche. .
You can have crappy seats, floppy headliner and no door inserts and get along just fine. But if your steering wheel isn’t up to par with your driving, it’s a potential safety hazard.
You can’t have that. So, in this article, we’re taking a look at steering wheel repair and what to add to your DIY steering wheel restoration kit.
★★★★★ "Have always used Lexol in past with good results but Torque product much better and works on all interior pieces ..have a 93 Corvette and seats are in good condition but now really nice look..can't attach pic but take my word.
.actually you can't go wrong with any of Torque Products" - Gary G.
What’s Wrong with Your Steering Wheel?
The vast majority of steering wheels are upholstered in leather or vinyl (marketed as faux leather).
Older classic cars like your dad’s favourite Chevelle have steering wheels made out of plastic or wood grain. We’ll cover those in another article.
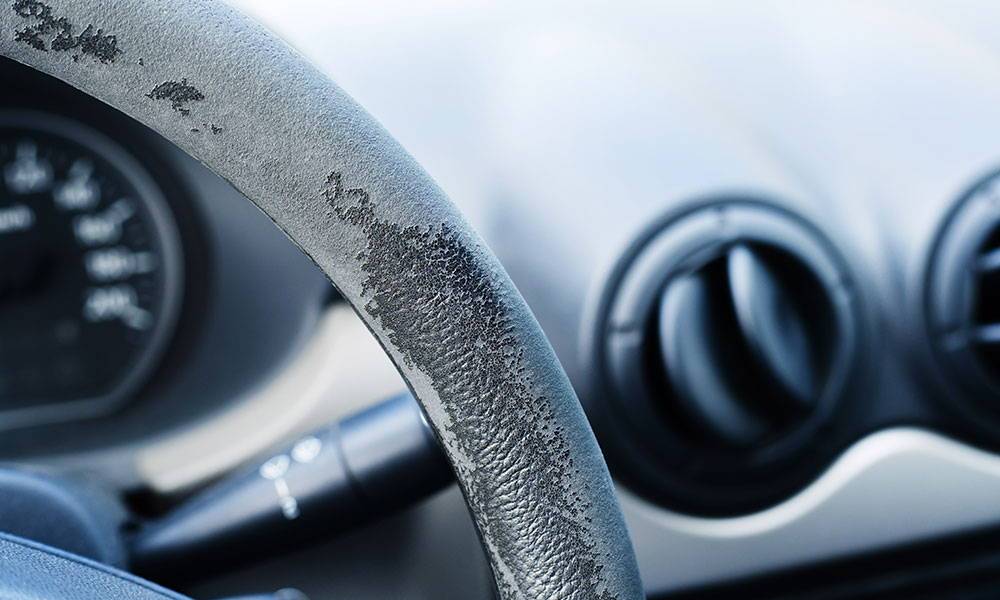
Leather, vinyl and plastic are organic materials and are susceptible to UV radiation. Overtime, exposure to the sun will break down the proteins and polymers in their structure. The materials dry up, losing their flexibility, color and texture. You’ll start to notice cracks and splitting, which eventually grow into large peeled patches.
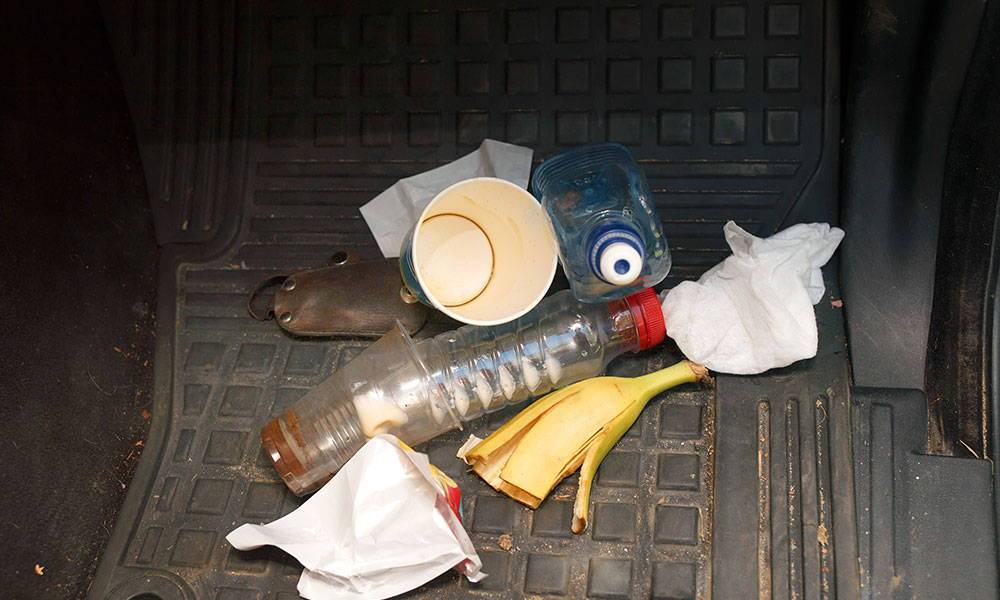
Add to that abrasion from your hands constantly squeezing and rubbing over the steering wheel, contamination from dirt, oils, sweat and various hand products that transfer over and it gets really nasty.
This feels unpleasant while driving, can cause you to get distracted or even lose grip of the wheel. Well, that last part is probably over exaggerated, but it bugs you out, looks horrible and you need to do something about it.
The more you neglect your deteriorating steering wheel, the worse it will get, before it’s completely beyond repair and requires replacement. Of course, this costs hundreds of dollars, which you’d rather not spend.
Sure, you can grab a $10 steering wheel cover from any automotive store or gas station, but if that was something you considered, you wouldn’t be reading this article in the first place.
In the case of classic, special edition or collector steering wheels, it may not even be a matter of money. Some original or period correct items are difficult and even impossible to find. And if you do manage, they may be in the same or worse shape, leaving restoration your only option.
But it’s not all grim. With some TLC, and a hundred dollars worth of materials and supplies, you can restore your steering wheel (both new and old) yourself.
Restore A Dry and Cracked Steering Wheel
In this section, we’ll look at aged leather steering wheels which are dried, cracked and peeling, but not fully gone. You can restore these by using leather conditioner products, filler putties and a good lick of dye and clear coat.
Let's get started.
Materials You Need
Here’s your shopping list:
- Leather restoration oil
- Leather cleaner
- Filler compound / epoxy paste and an applicator set
- Leather dye and clear coat
- Masking tape
- Microfiber and paper towels
- Fine grit sandpaper or sanding blocks - a set of 600 to 2000 will cover all your needs.
- Exacto knife
Most of these items can be purchased as a bundle in leather restoration kits from Amazon.
Remove The Steering Wheel
With the key out of the ignition, rotate the wheel until it locks. You don’t want it to move while you’re trying to get it out.
Next, pop up the hood and disconnect the battery. Remove the negative terminal first! Wait around 10-20 minutes to let all power drain from the vehicle, and especially the airbag that’s installed in the steering wheel.
Now, you’re ready to remove the wheel. On most types of wheels there are caps on either side that give you access to a bolt. Remove these bolts to free the airbag assembly. Take it out carefully and remove the wiring harness and set it aside. Remove any electrical connectors for your steering wheel controls.
Remove the central bolt and take note that there is usually some thread loctite applied. You have to reapply it before installation.
You’re ready to pull out the wheel, but before you do, make sure to make an alignment mark with a marker, so you can install it straight when you’re done with your restoration. Some wheels will come straight off, but many use a press fit, meaning you need a special steering wheel puller tool (Dremel and Mopar are excellent tool companies, or an OEM) to remove them. If you’ve replaced bearings or bushings before, you already know how to use one.
Either way, you can buy those relatively inexpensively or rent them out, if you’re only doing this one time.
Clean Meticulously
With the steering wheel out of the car, clean it thoroughly with your leather cleaner solution. Apply a liberal amount to a microfiber towel and rub it in well.
Coat With Leather Restoration Oil
Next, coat the leather portion of the wheel with restoration oil. These products replenish the lost proteins that were damaged by the sun. Most of them contain Vitamin E, which nourishes the leather and softens it up.
This is an important step, so don’t skip it.
One good tip is to coat the wheel in plenty of oil, then put it in a black plastic bag and leave it under the sun for a day or so. The heat allows the oils to penetrate deep into the leather and work its magic. The black bag will attract more sun, while protecting the steering wheel from UV rays.
Clean Again and Prep
Using the same leather cleaner and a paper towel clean the steering wheel thoroughly once more. You want to remove all the oils from the surface in preparation for the next steps.
If there is any peeling on the leather, you want to cut it off at a place where the leather is well attached.
If there is a heavy amount of gunk accumulated on the surface, which doesn’t come off through cleaning, you can use wet-sandpaper to remove it. Begin with a 600 grit piece and work your way up to 1,500 grit. Use light pressure and go over all the rips, cracks and peeled areas to smooth them out.
Fill Cracks and Scratches With Filler
Next, mix your filler compound according to the product description. Most come in two containers - a filler and a hardenner which you have to mix and turn into a paste, before applying onto the steering wheel.
Usually, they come with hard plastic applicators which make it easy to push them in the cracks and troubled areas. Work quickly, as most fillers begin drying shortly after being mixed. Don’t worry about any excess that gets on the leather, just focus on filling every crack and crevice, all rips and peeled areas.
After you’re done, use a paper towel to gently wipe off the excess, but be careful not to remove too much from the low spots.
Sand Smooth With Fine Sandpaper
After the filler compound is dry, sand with wet sanding paper, beginning with 1,000 grit and going up to 2,000 to make the wheel completely smooth.
If you need to, apply more compound to the troubled areas, let dry and resand until you get the perfect shape and surface.
Apply the Leather Dye
Clean once more and tape the areas where you don’t want to get automotive paint on. Then, apply the dye of your choice. Leather dye is typically wiped on, but for a more consistent finish you can spray it with a paint gun as well.
Store the painted wheel in a clean location away from dust and debris and let it dry for the recommended amount.
Finally, you can apply a leather clear coat, only light coats. This works the same way as with the paint over your body panels. The clear coat will protect the underlying surface from UV damage, abrasion, oils, sweat and dirt. Clear coat always dries glossy, so if that’s not the finish you’re looking for, you can skip it.
There we go, your leather steering wheel should look brand new.
★★★★★ "Have always used Lexol in past with good results but Torque product much better and works on all interior pieces ..have a 93 Corvette and seats are in good condition but now really nice look..can't attach pic but take my word.
.actually you can't go wrong with any of Torque Products" - Gary G.
Install a Custom Steering Wheel Cover
If your leather steering wheel is too far gone and beyond saving, the above process may not give you great or long lasting results. However, you can still give it a second chance in life by installing a custom-designed steering wheel cover.
Now, now, these are nothing like the cheap one-size-fits all steering wheel covers you buy at the store. There are companies which will produce a steering wheel cover specifically designed for your make, model and year. When installed, it will fit perfectly and make your steering wheel look and feel brand new.
These come in all materials - leather, vinyl, suede, fabric, even foam and rubber. The kit also includes heavy duty nylon lacing, sewing needles and detailed instructions on how to stitch them onto your steering wheel.
Your custom covers will give you at least a few years of tight grip and they cost some $50 - $100 - a fraction of the price of a brand new steering wheel.
Install Your Custom Cover
You can install the cover without removing the steering wheel from the car. The whole process takes about an hour from start to finish.
WARNING: If you have an airbag in the steering wheel, make sure to disconnect the battery and give it some 10-20 minutes before you start working. You don’t want it to go out in your face, while you’re working with needles and such.
Typically, your steering wheel cover will come as a sewn ring, which has the exact circumference of your wheel and is designed to wrap around it snugly. You’ll notice that if you bring the two ends together and give them a good tug, they’ll wrap perfectly to the grip circumference of the wheel, without any slack.
Position the cover on the steering wheel, taking note of the instructions regarding spokes, bumps or thumb rests.
The periphery is already evenly perforated for the lacing pattern. Review the lacing instructions and prepare your thread and needle. Then, just start at a random location and follow the stitching pattern carefully, not missing any holes. Make sure you’re pulling the thread thightly and the two ends of the cover meet in the center.
That’s it, an hour or so later, your steering wheel will look brand new.
Reupholster A Leather Steering Wheel
If you can’t find the right custom cover or don’t like the idea of inflating the grip circumference of your steering wheel, which inevitably happens, you can create and sew your own.
This is a more involved repair method, which requires some creativity, design and sewing skills. However, it will give you the absolutely best results out of all three, since you’re peeling the steering wheel clean and making a new fresh upholstery.
Here’s a general overview of the process.
Materials You Need
- High-quality leather or vinyl material for wrapping the wheel
- Strong nylon thread
- A sewing kit with curved needles
- Leather glue
- Scissors, rulers and markers
- Tape
You can buy these items at a sewing supplies store or a kit online.
Remove the Steering Wheel
We already covered this process, so look at the first section for instructions.
Remove the Old Leather Wrap
Use a box cutter or an exacto knife to cut the stitches on the inside and free the leather wrap. It should come straight off without much hassle.
Next, clean off the old rubber from the wheel. This can take a certain amount of elbow grease. Use a dish soap and water to break down the old glue and use an old detailing rag to rub the surface clean. If necessary, use wet sandpaper to remove all the residue and gunk.
Use the Old Wrap as a Template
You can use your old leather wrap as a template for your new one.
If you’re using leather, beware of the “grain”. Leather easily stretches in one direction, but not in the other. You want to cut your material diagonally, to combine these properties and get the perfect amount of flexibility.
Other materials behave differently, so do more research on the one you’ve picked.
Cut a wide band that’s an inch or two wider than the widest section of your old wrap. It’s a good time to practice your scissor skills as you want your final cuts to be as straight and sharp as possible for the best results.
Trim the Leather to Fit
Examine your spoke design and leave enough material to cover them properly. Measure the grip circumference of the steering wheel, double check your old wrap and trim the new piece accordingly.
Mark Your Sewing Lines
Research online for a stitch pattern you like and print diagrams to refer to as you’re working. Mark the sewing lines for your chosen pattern on the inside. Mark each hole with a marker and make sure you space them out perfectly with a ruler. Any deviation will show in the final stitch.
At this point, you should end up with a custom steering wheel cover that resembles some of the ready made kits available for purchase. You can also study those and copy ideas for your own.
Saw the Cover Over Your Wheel
Stitch the strip of material into a ring. The stitch should be on the inside. Position it over the steering wheel with the stitch in the bottom central position. Depending on the wheel, you may need to cut a little groove for the ends of the stitch.
Then, follow your desired stitching pattern to sew the ends together. Make sure to pull the cord tight so the stitch holds the leather perfectly in place. Using a plastic tool, you can manipulate the leather around the spokes and other plastic trim and use some glue to keep it in place.
This can be a nerve wracking process. Keep calm and methodically stitch your patter together. Take brakes if you need to.
If you do a good job, the cover should be tight over the steering wheel. The two ends should meet at the inside center and there shouldn’t be any slack regardless of your wiggle and twist the cover.
You’re done! A fresh new upholstery for your steering wheel. It was a good weekend project and it only cost you some $50 in materials and supplies.
Steering Wheel Maintenance Tips
The secret to leather longevity - be that on your steering wheel or elsewhere around the cabin is maintenance.
You want to clean your steering wheel at least once a week. To prevent oils and dirt from building into the pores and texture.
Use a dedicated leather cleaner like Torque Detail’s Leather Restore - a product formulated to deep clean leather without any aggressive chemicals that will deteriorate it over time.
Just spray some on a clean microfiber towel and rub it in the leather. Give it a couple of minutes and apply a second coat. Do this once every couple of months and your leather upholstery should maintain its flexibility, softness and shine for years to come.
Just apply some to a microfiber towel and give the interior a good wipe down. It’s all there is to it.
The second part of maintaining leather is the conditioner. UV rays will naturally break down the proteins in leather, causing it to dry, crack and peel overtime.
That’s what makes our Intra Clean + Intra Protect bundle so great. Start off with Intra Clean. It is both an interior deep cleaner and deodorizer. It’s a great product right before you make use of our Leather Restore product. Finally, spray on Intra protect. It’s a quality interior protectant that prevents UV fading.
★★★★★ "Have always used Lexol in past with good results but Torque product much better and works on all interior pieces ..have a 93 Corvette and seats are in good condition but now really nice look..can't attach pic but take my word.
.actually you can't go wrong with any of Torque Products" - Gary G.
Conclusion
Restoring an entire steering wheel that is badly damaged and neglected isn’t the easiest job in the world. However, with some patience and time, you can do it and make your old steering wheel brand new, saving hundreds of dollars in the process.
I help run the day to day for America's Number #1 Car Wax Mirror Shine by Torque Detail. As a Certified Detailer by the International Detailing Association, I use that knowledge to help create products that get professional grade results with super simple application techniques.