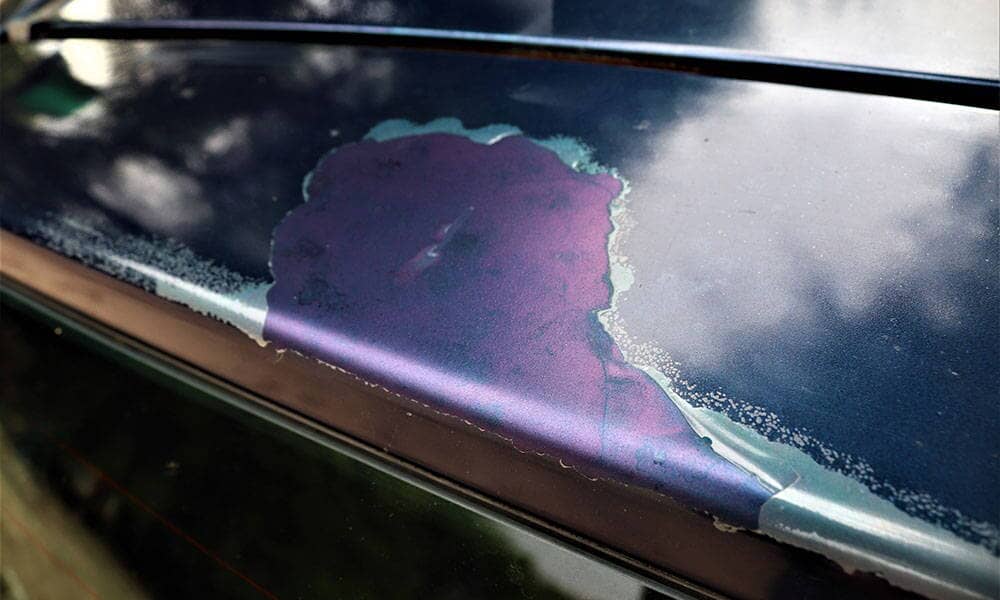
Is your car’s paint bubbling and blistering? Are there jagged matte spots outlined by a flaky white substance on the hood, roof, or trunk? Sounds like you’ve got a case of peeling clear coat.
This is obviously bad, as well as expensive to fix, but it’s not impossible to remedy. Stay with us as we explore all the details about peeling clear coat and how to go about repairing it yourself.
★★★★★ "My car is slick as glass!! I put the Ceramic Spray on my Corvette Stingray and it is very slick and shiny. I should have purchased it sooner. It is a great product. It made my wheels look new. Keeps off dirt and dust." - Charlie F.
What Causes Peeling Clear Coat?
You mostly see the clear coat peeling on older cars that have been parked outside for years.
The clear coat is the top-most layer that comprises the paint of your vehicle. It’s a type of synthetic polymer substance - usually an acrylic or urethane plastic. These are pretty durable, as it’s their job to protect the paint and primer layers from just about anything. Clear coats are resistant to UV rays and most chemicals found in the environment.
The reason clear coats peel is because there isn’t a proper bond to the underlying color coat. As the clear eventually deteriorates and wears off, the lack of adhesion will cause the clear around the damaged area to peel back, starting a chain reaction that requires immediate repair.
Nothing lasts forever. Prolonged exposure to the sun, and specifically to UV radiation, will eventually deteriorate and break down any type of plastic. It doesn’t happen overnight, but give it years and the plastic will begin to fade, discolor, dry out, and become brittle. This is true for all plastic trim inside and out of the vehicle, and the clear coat is no exception.
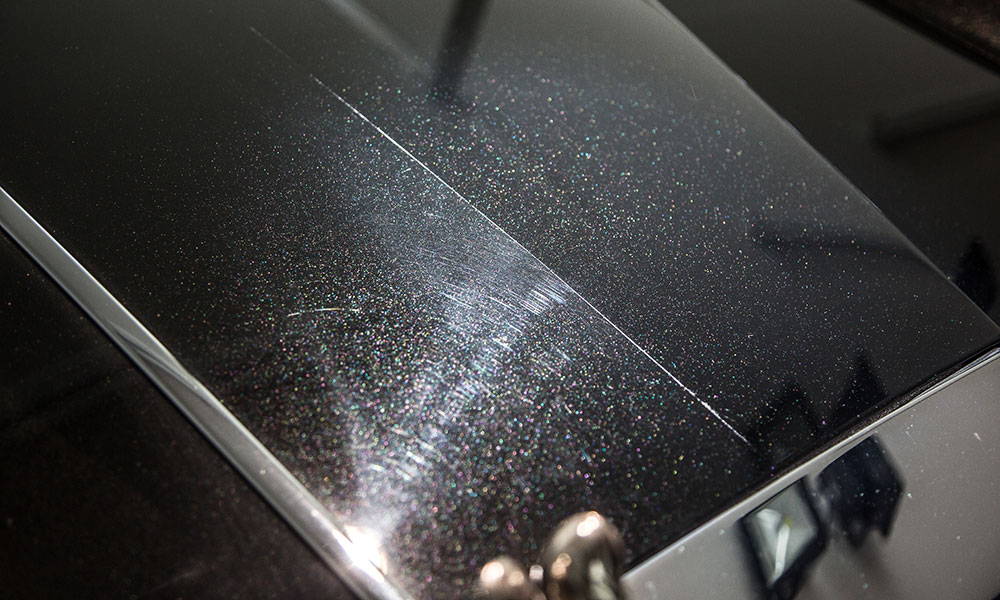
Further aided by the elements, mechanical abrasion from dust, dirt, road salt, or washing with harsh chemicals and/or brushes, the clear coat will thin out over time. Eventually, you’ll see faded spots appear on the horizontal flat surfaces. Notice that the first spots will almost always form on horizontal surfaces, since the UV rays hit almost parallel, transferring the most energy to the surface.
The matte surface of the spot is the paint layer. There is no clear coat - it’s completely gone. The white flaky stuff around the spot is the edges of your clear coat. Once the process has started, it won’t stop on its own. As more area is exposed to the elements, contamination will get underneath the clear coat and accelerate the peeling until the entire panel is stripped.
Huge factors, maybe even the biggest ones, are the composition of the clear coat, the compatibility with the base color coat, and of course, the quality of installation. Cheap products will not last. Neither will botched paint jobs.
Sometimes, even the manufacturers get it wrong - 1996 to 2013 Hondas and 1980s to late 1990s GM vehicles are notorious for having their clear coat peel severely after some years of use. Even though manufacturers have largely automated their painting facilities, an incorrect strategy can cause lack of adhesion between the different coats, and therefore premature paint failure.
Here’s What Will NOT Fix A Peeling Clear Coat
So, how do you fix a peeling clear coat?
We have to break it to you. There’s no easy fix, no magic product, no trick to deal with a peeling clear coat in 15 minutes. Once the clear is gone, it’s gone. The only thing that can replenish the finish is more clear coat, and this is neither quick nor easy.
To save you some time and frustration, here’s what’s already been tried and tested to not work.
- Using a razor blade to scrape the peeling areas - You might be able to remove the flaking area around the spot. However, at best, you’ll be left with a hard noticeable border between the area where there’s no clear coat and the rest of the panel. Plus, it’s highly likely that you’ll make a mistake in the process and add deep scratches that will only further compromise the paint layers.
- Coating the troubled area - People have tried WD-40, waxes, paint sealants, even ceramic coatings. These might protect the paint from further damage temporarily, but they will not mask the visual difference between clear coated and stripped areas. In the case of the first three, any protection will only last until the next wash. Ceramic coating the panel will only make it harder - honestly, an uneconomical choice when it comes to repairing the issue properly later on.
- Polishing the panel - Polishing is a step in the right direction, but not nearly enough. You may be able to remove the flaking areas and even restore shine to the spot where clear is missing, somewhat blending the two areas. However, the exposed color coat will quickly oxidate and deteriorate under regular environmental conditions. After a while, it will be permanently damaged and require a complete repaint. So, it’s at best a temporary solution that needs more decisive action.
- Spraying clear coat on top of the peeled area - You’re almost there, but not quite. You can’t just buy a spray can at Home Depot and execute the repair in the parking lot. You will protect the paint from further damage, but the horrible spots will still be visible and in all likelihood, the bond will be compromised outright. It won’t last unless you spend a healthy afternoon on surface prep.
Don’t waste your time with silly repairs. Stick to the end of this article to find out how you can solve the problem yourself.
How A Paint Shop Fixes Peeling Clear Coat
If you take your car to a paint shop, they’ll ask to repaint the entire panel. Depending on the severity of the case, they can do color and clear, or start all the way from the primer up.
So how does it work?
They’ll start by washing the panel thoroughly.
If the problem is on the hood or trunk, or somewhere else easily removable, they’ll remove it for easier access. Otherwise, they will have to mask the adjacent panels, sometimes the entire car, to prevent overspray.
Next, the painters will sand the entire panel free of clear coat and level the base coat to remove any oxidation and other damage. Typically, 400 to 600-grit sandpaper is used for this stage. If the paint is too far gone, they’ll sand into the primer layer and use as rough as 220-grit, then sand their way up to get a finer surface.
The panel will be washed with water, then cleaned with a degreaser, and finally wiped down with an isopropyl alcohol and water solution to prepare the surface for painting.
If they sanded the panel all the way down, they’ll start by applying a primer on the affected areas. Once cured, they’ll sand with 1500-grit sandpaper to level the panel and get a good base surface.
Next, the color is matched to the vehicle. If it’s a factory color, these go with a code, so it’s easy to replicate in any paint shop. If it's a custom color, it takes a bit of trial and error until they get it just right.
Several coats of color are sprayed onto the panel. The bare minimum is two, but they’ll likely go with more if they had to strip it down all the way to the primer.
Of course, applying the paint is its own art and science. The proper compressor settings, paint gun nozzle, distance from the surface, overlap, and flash times between coats are all instrumental for getting a great consistent finish. So is the steady hand of the painter themself.
Finally, the clear coat is sprayed. A polyurethane clear coat is mixed with the right amounts of reducer and hardener to make it thin enough to spray well, but dry out solid quickly after application.
Usually, three coats are applied, with the final one being a little heavier to ensure the entire surface is covered and sealed. Each individual coal is left to flash for 5-10 minutes before the next one is applied.
After 24-48 hours, the clear coat will have cured enough to return the car to the customer. Full curing occurs after 7 days, but you shouldn’t use any wax, ceramic coating, or paint protection film for at least a few weeks to 1 month to allow for any off-gassing to occur.
Sound like a huge hassle? That’s because it is, and it’s not going to come cheap. Expect to pay at least a few hundred dollars to repaint a body panel, and a few grand to repaint an entire vehicle.
How To Fix Peeling Clear Coat Quickly And Easily
By now it probably looks pretty grim - either for your car or for your wallet.
But what if the peeled area was just a small spot - the size of a cup coaster, or just some bubbles or blisters, for example? You’ve caught the problem almost immediately and the base coat seems intact.
Well, there’s a way to cut down on the hassle and repair a slightly peeling clear coat by respraying a small area and blending it in with the rest of the panel. You can do it yourself and spend only a few hundred dollars on tools and supplies, some of which you may already have.
Here’s your shopping list:
- Car Wash Kit - soap, wash mitt, microfiber towels
- Fine Scotch Brite - specifically one for auto body repairs
- Isopropyl alcohol and distilled water (50/50 mix)
- Tack cloth
- Masking tape and dispensable sheets or paper towels
- Clear coat spray can - make sure it’s a 2K product that has its own hardener
- Sandpaper kit - 1000 to 2500-grit for dry and wet sanding
- Polishing machine with a polishing pad OR a hand drill with a polishing attachment and polishing compound
You also need a garage to keep the car clean and away from dust and flying debris for at least 24 hours.
★★★★★ "My car is slick as glass!! I put the Ceramic Spray on my Corvette Stingray and it is very slick and shiny. I should have purchased it sooner. It is a great product. It made my wheels look new. Keeps off dirt and dust." - Charlie F.
Step 1: Prep The Panel For Work
If you haven’t washed the car in a while, do so in the driveway. Wipe it down and get it inside. Alternatively, if it’s fairly clean, just wash the panel you’ll be working on and the adjacent areas.
Use masking tape to cover the edges of any adjacent panels that won’t be resprayed. Make sure the tape goes inside the panel gap - however, don’t let it contact the panel you’re going to repair. Otherwise, you may accidentally peel off your brand new clear coat when you remove the tape!
Step 2: Remove The Peeling Clear Coat
Grab your fine Scotch Brite (make sure it’s the automotive type) and start rubbing the worst areas first. Use light to medium pressure and try to knock off all the peeling flakes. If the color coat is exposed, use very light pressure and focus on the borders.
You can also use fine sandpaper - test with 1500-grit and go up or down depending on the hardness of the specific clear coat.
Don’t try to scrape it away with a razor blade or anything hard enough to scratch through the clear. If you add deep scratches, that’s just more work for you to remove.
Step 3: Scuff Up The Adjacent Areas And Create Blend Zones
After removing all the flakes and thoroughly scuffing the repair area, you need to create a blend zone extending about 3-4 inches in every direction. If it's near the edge, just extend the work area all the way. Use the same Scotch Brite or 2000-grit wet sandpaper and very little pressure to scuff the blend zone, so that the new clear coat has a strong foundation to attach to. Try to make the transition gradual and tapered toward the old clear coat so you have an easier time blending.
Step 4: Final Clean
Clean with water, then wipe with isopropyl alcohol or tack cloth to ensure that every bit of dirt and dust is removed. Make sure the surface is completely dry before moving onto the next step.
Step 5: Mask The Work Area
Use masking sheets, plastic foil, old newspapers, or paper towels to cover any adjacent panels you don’t want to spray over.
The hardest part is the periphery of the working area. You need to tape a piece of paper in such a way that it covers the work area and ends somewhere in the blend zone, leaving some of the scuffed area on the outside. Then, fold the paper back so you’re left with a soft edge at the border of the work area. This way, it will be easier to blend in the new and old clear coats when you’re done spraying.
Step 6: Apply Your Clear Coat
Before you start spraying the clear, read the manufacturer’s instructions. There should be information about the following:
- How to mix in the hardener
- How many coats you need to apply
- What flash time to wait before applying the next coat
- How far to keep the spray nozzle from the surface
- How fast to move the can
Getting these right is essential for producing an even and consistent finish across your repair area. It’s not an exact science and will vary by the case. However, these are the generally accepted instructions.
Shake the can thoroughly for a few minutes, then release the hardener (usually by attaching a little button to the bottom of the can) and shake again.
Put an appropriate mask or respirator on. You don’t want to breathe this in. Spray away for a couple of seconds to make sure the nozzle sprays well. If you don’t need the whole can, or if you bought spares, it’s best to practice on some piece of metal you have lying around.
When you’re ready, hold the nozzle about 8 inches away from the surface and add a light to medium coat, overlapping your strokes by some 30-40%.
Make sure you’re going back and forth so you can keep track of how much product you apply and where. Don’t go all over the place and get your hand moving before you press the button. Likewise, release the button before you finish your stroke. Never spray in only one place - keep your hand moving at all times. You want to apply the product consistently, and you definitely don’t want any blobs.
Light, medium, and heavy only reflect how fast your hand is moving and therefore how much product you’re applying on the surface. Slow movement is always better than more product. Go lighter rather than heavier to avoid running and dripping, which will kill your finish.
Spray two to three coats and give them 10 minutes of flash time in between. When you’re done, leave the car overnight and then inspect the results.
Step 7: Blend, Polish, And Finish
After the clear coat has hardened, you can remove the masking paper by pulling the tape away from the coated panel. Again, after all this work, make sure you’re not stripping away the clear you just sprayed. Be careful!
You’ll find that on the borders, despite the effort to produce a softer edge, there’s still an abrupt line separating the freshly sprayed clear from the rest of the panel. You have to blend this by wet-sanding the area. Start with 2000-grit sandpaper soaked in water. Use light pressure and regularly add more water to keep the area wet. You can go up a notch to 3000-grit and expand the blend zone slightly outward.
Finally, it’s time to polish the transition. Use a polishing machine of your choice with a medium cut pad and compound and a low speed setting.
It’s very important to polish in a direction away from the new clear coat so that you don’t peel it back. Hold the machine at an angle so the contact is on the narrow edge of the pad and double-check that the rotation is right. Then, using no pressure, basically just the weight of the machine itself, make individual passes, lifting and starting over from the repair area.
Check your results every few minutes and stop when the transition is barely noticeable up close. Consider polishing the rest of the vehicle while you’re at it.
Shine & Protect Your Work
All of this could have been avoided!
In this day and age, there’s a plethora of paint protection products that will preserve your clear coat for years to come.
Waxes and paint sealants are well known already and enjoy a healthy following. These products are easy to work with and fairly cheap. However, they wear off rather quickly and require more frequent applications.
Arguably, the best product is the ceramic coating. It’s applied either in liquid or spray form, and it cures to a thin but solid, glass-like layer on top of the clear coat. Once dried, the ceramic coating will protect the paint from UV radiation, heat, water, chemicals, brake dust, bird poop, tree sap, acidic or caustic cleaning solutions, and anything else you can think of that wants to eat at your paint. It lasts for years and will make washing and maintaining your paint an absolute breeze.
These are not too difficult to apply, but any mistakes will be locked solid in the finish once the coating cures. That’s why the best products out there are only recommended for professional installation only, which can be almost as expensive as a paint job.
Since you’re on a DIY ceramic coating route, consider Torque Detail’s Ceramic Spray spray-on ceramic coating. This is a hybrid product - it’s easy to apply like a paint sealant, but carries some of the properties of a traditional liquid coating.
Ceramic Spray contains SiO2 ceramic particles suspended in a polymer-type sealant that give the finish a similar shine, as well as hydrophobic and anti-static properties. However, it offers slightly reduced protection and longevity compared to a traditional ceramic coating.
Even so, given the situation, it might just outlast your clear coat repair. Spray coatings are half the price of a liquid coating, so you’re getting the biggest bang for your buck.
★★★★★ "My car is slick as glass!! I put the Ceramic Spray on my Corvette Stingray and it is very slick and shiny. I should have purchased it sooner. It is a great product. It made my wheels look new. Keeps off dirt and dust." - Charlie F.
Summary: Patience And Realistic Expectations
If you’ve done it right, you should see an incredible improvement from the initial condition. From normal viewing distance (a couple of feet), the panel should basically look brand new.
Upon closer inspection, you’ll probably be able to see some imperfections and transition lines through the new clear coat, but that’s only to be expected. You can continue polishing and get some incremental improvements, but acknowledge that this method will not produce 100% perfect results.
That said, 95% improvement will still make your car look absolutely stunning to everyone who doesn’t know exactly where to look for the seams.
All of this for a couple of hundred dollars and a few hours of your time feels invigorating and much more rewarding, not to mention cheaper, than getting it done at a professional shop.
You can do one panel each weekend and have your daily driver look factory new by the end of the month.
There’s no guarantee how long the repair is going to last, which is the main reason why no paint shop will want to do this for you. However, if you spare no effort and purchase quality stuff, you should get a couple of years out of it before the problems come back.
If the car was neglected for too long and the damage has penetrated the exposed color coat underneath, this DIY fix may no longer be an option, and a full repaint will be required. In this case, unless you have some experience painting, it’s best to entrust the task to a professional paint shop.
Whichever route you decide to take, remember that if it happened once, it’s likely to happen again. Get a paint protection product on and you won’t have to deal with this while it lasts.
I help run the day to day for America's Number #1 Car Wax Mirror Shine by Torque Detail. As a Certified Detailer by the International Detailing Association, I use that knowledge to help create products that get professional grade results with super simple application techniques.