Ready to Learn How To Clean Car Interior? Learn all the little details to get your car interior spotless.
We spend so much time in our cars, almost 160 hours per year to be exact, but for some odd reason many neglect cleaning car interiors. A clean car interior is a must in making sure your vehicle retains its value & also keeping you and your family safe from germs and viruses.
We will take you step by step on how to clean a car interior all while providing you tips & tricks that professional detailers use in order to make the inside of your car feel brand new!
Once your car interior is spotless check out our (How To Detail a Car: Detail Your Car Like a Pro Detailer!) article to learn how to give your local professional detailer a run for his money!
★★★★★ "So far I've used Mirror Shine, Turbo, Tire shine, and now Intra Shield and Clean. All products have performed as advertised and I am very happy with the results. Now to try the car wash and my detailing kit will be complete." - Bill L.
Must Have Supplies: What Do You Need To Clean Your Car's Interior?
Just like any detailing task, cleaning the interior of your car requires a few simple tools & cleaning products that you can easily find in your local store, Amazon or online.
We will also include links to all our favorite car interior cleaning tools & products throughout the article to save you time and money!
- Intra Clean + Intra Protect: The Best Interior Detailing Kit
- Two empty garbage bags
- A vacuum cleaner with crevice tool attachments (preferably a shop vacuum)
- Detailing brushes
- Stiff bristle cleaning brush
- Clean microfiber towels
- Car interior cleaner or All Purpose Cleaner
- Car carpet shampoo
- PH neutral leather cleaner
- Ammonia free glass cleaner
- Safety Gloves
Step 1: Remove Your Floor Mats
Floor matts are great for protecting your carpets, but overtime a lot of dirt and grime can get stuck underneath. Put on your safety gloves and go around your car's interior making sure to remove all your floor matts so you can see the true condition of your carpets.
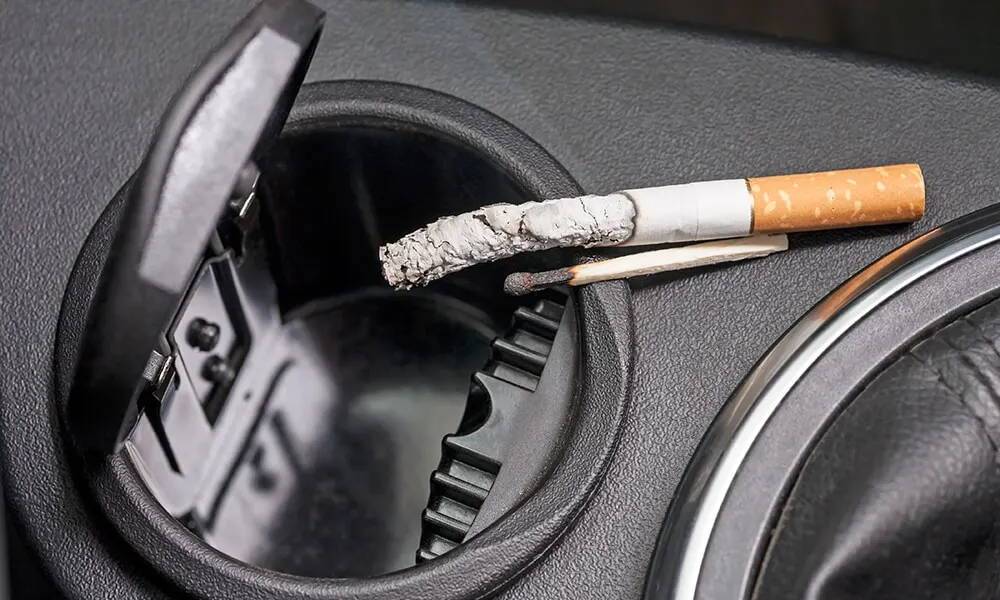
Step 2: Empty The Car Interior & Light Vacuum
You want to make sure to empty the car interior of any personal items as well as any large trash that your vacuum will not suck up. Grab your first empty garbage bag and place all personal items in it such as check books, insurance papers, change, and anything else of value to you. After you're done put this bag to the side for safe keeping.
Then grab your second garbage bag and start disposing of any large garbage such as empty plastic bottles or large pieces of food. Anything your vacuum might struggle picking up make sure to throw in your second garbage bag for you to discard.
Pro Tip: If you have food crumbs and grime in your cup holders and storage compartments, give them a light vacuum prior to step 3!
Step 3: Cleaning the Dashboard, Door Panels, and Center Console
"After prepping my interior, I applied Plastic Restore to all the interior plastic and trim, excluding the trunk area and a small portion of the dash. Plastic Restore did a great job, very consistent color wise." —Spencer Mac, Professional Detailer
Starting with your dashboard grab a clean microfiber cloth towel and fold it in half, spray Intra Clean on to your towel, then rub it across your dashboard making sure to pick up as much dirt and grime as possible.
If you feel like your towel is getting dry, spray more cleaner on your towel and keep cleaning until satisfied. After you cleaned the surface with your initial cleaning towel, grab a new clean cloth microfiber and buff the area you cleaned to a nice finish, making sure to remove all leftover interior cleaner. Continue this process on your door panels and center console while utilizing your detailing brushes to get into all the nooks and crannies around your vehicle.
Finally, it's time to add some additional protection to your dashboard. Our Interior Detailing Kit includes Intra Shield which adds an extra layer of protection to your interior and defends against harsh UV rays. It's recommended to give your interior one more quick vacuuming to ensure no dust particles are on the surface of the dash. Spray on the Intra Shield, buffing it in with a clean microfiber towel. Use a second clean microfiber to wipe off the excess product. Don't touch the surface for another 24 hours to allow the product to cure.
Pro Tip: Always spray your interior cleaning solution on your towel or detailing brush, if it's heavily sprayed on plastics and drys it can leave streaks and also damage sensitive electronics!
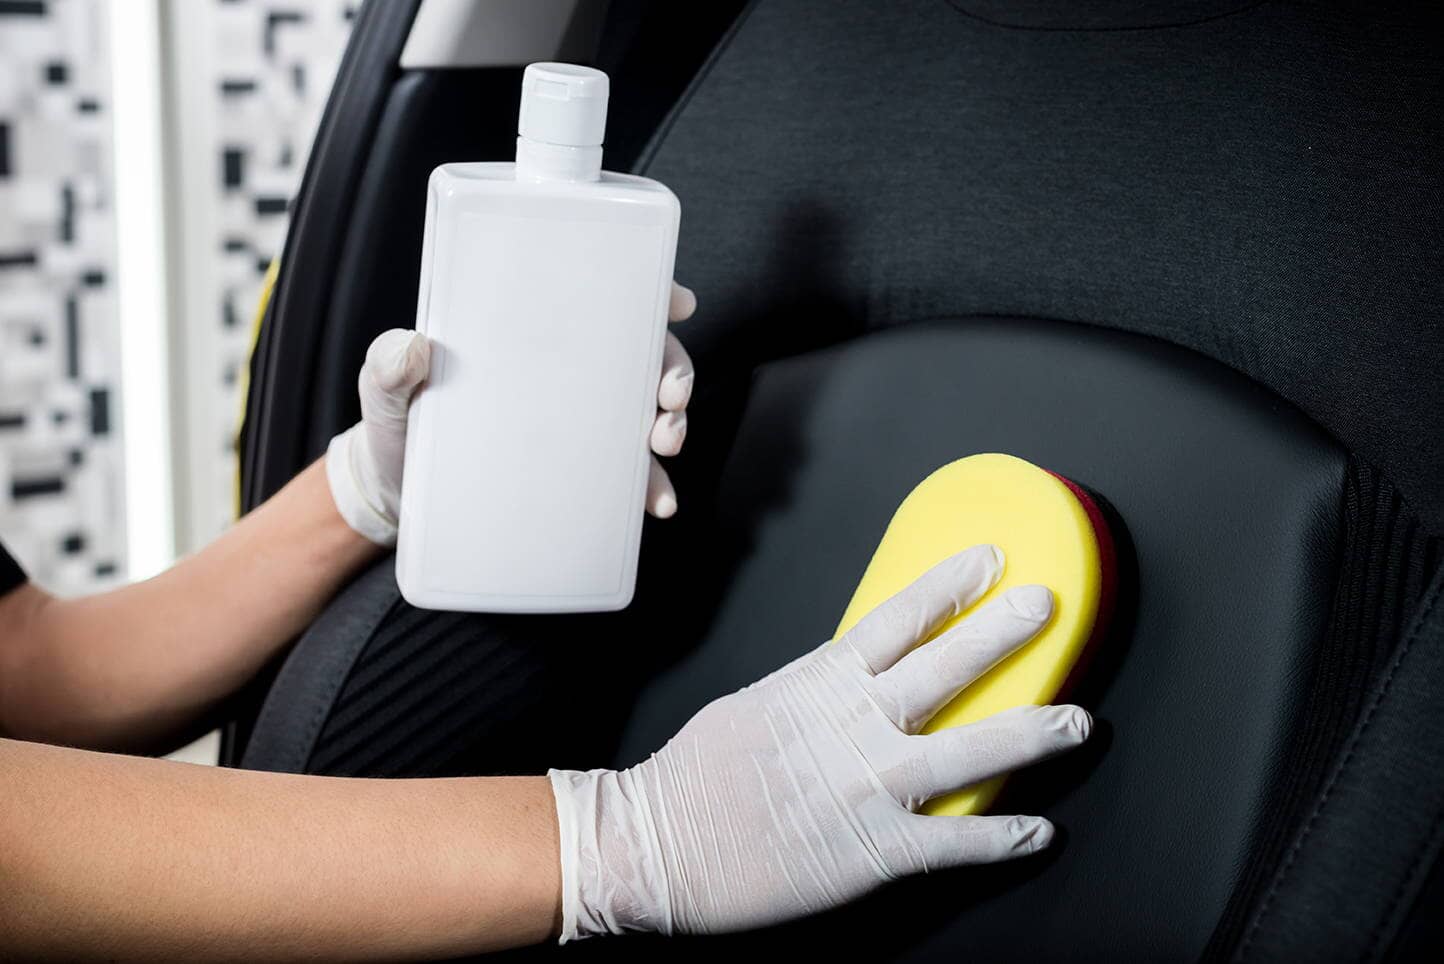
Step 4: Cleaning Vinyl & Leather
Vinyl and leather are durable materials, but if the wrong product is used or left on the surface too long it can cause permanent damage, so always make sure to use dedicated vinyl and leather cleaners!
Take your vinyl and leather cleaner and deliberately spray it in your detailing brush, and start to lightly scrub the surface of the vinyl and leather. Then take a clean microfiber towel and wipe off all the leftover cleaning solution.
Pro Tip: Make sure to clean your vinyl and leather seats in sections so your cleaning solution doesn't dry off on you!
Step 5: Brushing Crevices & Vents
Now it’s time to take care of all the nooks & crannies such as air vents, there's not much space to work with in these areas, so it's a great time to break out that quality detailing brush!
Use your detailing brush to brush off as much loose dust and grime from your vents, after that spray a small amount of interior cleaner on your brush, agitate, then perform a thorough wipe down making sure to remove all the grime & leftover cleaner.
Pro Tip: If you don't have a detailing brush available grab a microfiber towel and wrap it around your finger or a popsicle stick, this will help you get in all those little areas of the vehicle! A clean soft bristle toothbrush can work in a pinch!
Step 6: Vacuuming Carpets & Car Seats
Now it’s time to vacuum out all the grime from your carpets & car seats!
Turn on your vacuum starting from the drivers side and start vacuuming your car seats. Make sure to recline your seats and get in between the edges and bolsters. After that push your seat as far back as possible and start vacuuming your carpets. Continue this process around the vehicle making sure to move your seats back and forth so you don't miss any grime underneath.
Pro Tip: This is also a great opportunity to vacuum out your carpet floor mats you took out of your car interior earlier! If you have plastic floor matts spray them down with your interior cleaner or APC and loosen up dirt and grime with your detailing brush and wipe down with a microfiber towel.
Step 7: Shampooing Carpets & Upholstery Seats
After prepping the vehicle with a heavy vacuum now it's time to shampoo your carpets & upholstery seating. Starting with your upholstery seats, take your upholstery cleaner and lightly mist the area you're working on, then with a stiff bristle cleaning brush, scrub the area until satisfied.
You can spray more carpet cleaner or shampoo on heavily stained areas and let it sit on the surface for a few minutes to break down stains. After scrubbing the shampoo take a clean microfiber towel and scrub the seats to remove as much shampoo residue as possible.
You can also take your vacuum and suck out excess moisture & dirt left in the upholstery as well. Repeat this process on the rest of your vehicle including your carpets until satisfied.
Step 8: Protecting Your Car's Interior Surfaces
Now that you spent all that time cleaning your vehicle we need to add some protection to prevent UV damage on things like plastics, vinyl, and leather.
Starting with your plastics & vinyl take your choice of interior conditioner/protectant and spay it on a new microfiber towel. After that rub the protectant into all your plastic and vinyl surfaces making sure to evenly apply. If you're satisfied with how the finish looks, great! If it's too glossy for you, take another microfiber towel and matte the gloss down until satisfied.
Complete the same process on the leather but with a dedicated leather conditioner/protectant. You want to make sure you don't use a plastic/vinyl conditioner or protectant on leather because they are two completely different types of surfaces
Pro Tip: There are also ceramic interior coatings for your car's interior! These ceramic interior coatings provide your interior surfaces far greater and longer lasting protection compared to your standard interior conditioner! Just like paint coatings each interior coating is different so make sure to follow manufacturer instructions during application.
Plastic Restore will help you clean grime off your door panels, interior panels, dashboard and any plastic surface. It also cleans any exterior plastic or vinyl!
Step 9: Eliminating Odors and Car Interior Sanitation
Now that the vehicle looks clean we also have to make sure the car IS clean! Interior sanitation and odor removal all depend on your needs for your vehicle.
There are hundreds of sanitation and odor removal products and tools on the market so the process depends on what you end up purchasing. Most sanitation is performed by alcohol and hydrogen peroxide based disinfectants along with commercial steam cleaners and ozone machines which can cost you hundreds maybe even thousands of dollars.
An easy way to disinfect major surfaces such as door handles, door panels, and steering wheels would be to use disinfectant wipes or spray. Just make sure to wipe down all your interior surfaces prior to applying your car interior protection. If done afterwards it will possibly strip off your protection.
As for lingering odors I recommend you use an Enzyme based odor eliminator, they are typically in aerosol format and can be left in the vehicle overnight eliminating most odors in your car's interior.
Step 10: Don't Forget the Trunk!
Many individuals including detailers forget to clean out the trunk! So make sure to clear the area from large items and give it a nice deep vacuum.
Sometimes a cleaning brush is useful for trunk areas because of the lower quality carpet typically used in trunks. Brush down the trunk fabric with your cleaning brush and follow it up with a deep vacuum to remove dirt and grime. Repeat this process and use carpet shampoo or interior cleaner where needed.
Plastic Restore
The unique spray formula couldn’t be easier to apply. Simply spray on, let it soak deep for 60 seconds and wipe off!
"Used on both interior and exterior plastic parts. I am very pleased with the results. The dashboard is very nice looking and does not attract dust. Bleached looking exterior parts look like original." - Jack S
Step 11: Wipe Down Door Jambs and Door Sills
Door jambs and door sills are also considered as the interior of the vehicle because you can't see them for the exterior, so make sure to clean them up!
Take a quality quick detailer or a PH balanced interior cleaner and spray down the door jambs and sills, use a detailing brush to loosen up any dirt and grime in smaller areas and then buff to a shine with a quality microfiber towel.
Pro Tip: You can also top off your door jambs and door sills with a quality spray wax or sealant! This will keep them protected and easier to clean until your next wash or interior detail.
Step 12: Cleaning Glass
Time for our final step which is your glass!
Make sure not to use a general purpose glass cleaner like windex, most home glass cleaners have harsh chemicals like ammonia that can damage window tint and car interior plastics.
Use a dedicated car glass cleaner with a new quality low pile microfiber towel. Spray a few mists of window cleaner pointing away from your car on your microfiber towel then going from left to right start cleaning your glass.
Flip your towel to a fresh side and buff to a high quality streak free shine!
Try not to use too much glass cleaner in your towel, it will over saturate your microfiber towel, causing your glass to streak. Continue this glass cleaning process throughout the vehicle making sure to clean your front and rear windshield as well as your speedometer and rear view mirror.
★★★★★ "So far I've used Mirror Shine, Turbo, Tire shine, and now Intra Shield and Clean. All products have performed as advertised and I am very happy with the results. Now to try the car wash and my detailing kit will be complete." - Bill L.
Pro Tips On Keeping Your Car Interior Clean:
- Vacuum your car at least once a week or whenever you feel its needed, this will keep dirt and grime out of your car interior keeping it cleaner longer!
- Keep a quality microfiber towel and a bottle of your favorite interior cleaner in your glove box or trunk. This is great for quick cleans for light spills and grime!
- If you have carpet floor mats it's always a great idea to protect them with weathertech floor mats or a quality plastic floor mat from your local store or online. Plastic floor matts are much easier to clean and a lot cheaper to replace compared to factory floor mats!
- Cup Holder liners are great for light spills, dirt, and grime that accumulate in your center console. They are removable so they are easy to clean and cheap to replace when needed!
- Apply plastic, vinyl, and leather conditioners on a quarterly basis. This will help keep your plastics, vinyl, and leather conditioned and protected from the harsh UV rays helping prevent cracking and fading!
- Applying fabric protection such as scotchguard or fabric coatings are great options to prevent major staining and make your upholstery and carpet easier to clean over time.
- Door Panel Liners are great for people with families or pets! They prevent kids staining your door panels or pets permanently scratching your interior plastics!
- Keeping a few disinfecting wipes or hand sanitizer is also great to keep your vehicle disinfected throughout your week!
- Stay away from paper towels and use clean microfiber towels! Paper towels will cause some micro scratching over time. Blue shop towels can be abrasive as well.
Mirror Shine Wax & Sealant Hybrid Spray
Get showroom shine with diamond-like protection in just minutes! Car maintenance has never been easier.
Time To Enjoy Your New Car Feel or Detail Your Exterior
Now that your car interior is clean and disinfected you can go about your day enjoying that awesome new car feel!
Ready for exterior car cleaning?
Get your paint looking like new with our exterior cleaning guide (How To Detail a Car: Detail Your Car Like a Pro Detailer!) and impress all your friends and neighbors with a clean and shiny car!
I help run the day to day for America's Number #1 Car Wax Mirror Shine by Torque Detail. As a Certified Detailer by the International Detailing Association, I use that knowledge to help create products that get professional grade results with super simple application techniques.