Washing an RV is nothing like washing a car, SUV, or truck. Some class A motorhomes even stretch up to 45 feet. RVs also come in different types and shapes. Therefore, washing an RV requires a well-thought-out strategy, an abundance of cleaning products, plenty of water, and if you can get it, additional manpower. This article highlights the different aspects you must consider when washing and waxing your RV.
★★★★★ "Saw this being promoted on a big YouTube channel and thought why not try it. Was a bit skeptical but WOW. Super easy to apply and car is shining. Water still pelts off 3 weeks later! Gonna ditch the wax and will continue to use." - Josh S.
Why Is It Important To Wash Your RV?
When dirt and grime is left to collect on the surface of your RV over a long period, it cakes up and hardens, making it harder to remove when you finally get around to cleaning your rig. While trying to remove the caked-up dirt, you may end up smearing and smudging it over the surface of your rig, causing scratches and swirl marks.
Dirt and grime can also damage your RV. RVs have many sections and numerous features with seals and connections, most of which can easily be compromised when dirt builds up on the outside. For example, the gaskets around their doors, windows, or sliding sections can get damaged or corroded when dirt and grime collects in them.
Moreover, when dirt and moisture collects on the roof of an RV, it can lead to the buildup of moss or algae, which can cause mold or rust to set into the walls of the RV.
There’s also the fact that dirt and grime makes an RV look old and causes it to actually age faster. If you’re planning on selling or trading in your RV some years down the road, you need to clean it regularly to ensure it gets a good resale value when you finally decide to let go of it.
How To Find An RV Wash Near Me (And Should You?)
Finding an automated car wash for your RV isn’t as easy as it is to find one for your car, van, truck, or SUV. Most automated car washes aren’t equipped to handle vehicles as big as RVs, so any attempt to navigate your RV toward an automated car wash may cause the employees to start waving their hands at you frantically as they try to stop you. Besides this, the jets of water in a car wash can flood and ruin your RV’s vent fans and ceiling HVAC system. The different attached features on your RV, e.g. your TV antenna, may also get damaged in a car wash.
Therefore, you’re better off cleaning your RV yourself. When you do so, you have more control over the cleaning products and equipment used in the cleaning process, meaning that you’re sure to get better results. Plus, when cleaning your rig yourself, you’ll be able to give better care to all the sensitive or vulnerable parts of your RV, making it last longer. Read on to learn how to DIY!
RV Washing And Car Washing - What’s The Difference?
- RV washing requires more resources: The size of RVs vary depending on the type, but they can be several times bigger than regular cars. This means you’ll require more time, more water, and more products when cleaning them.
- Special care to certain parts: Unlike most cars, RVs incorporate many features that have to be handled carefully to avoid damage when the washing is being done, e.g. ceiling HVAC systems.
- Different types of surfaces: While most regular vehicles feature just one type of body surface (painted metal), RVs feature different types of body surfaces that have to be washed in different ways, using different products. The bodies of most RVs are made from metal, painted metal, or fiberglass, while their roofs may feature rubber or fiberglass materials.
How To Wash An RV Yourself
Washing an RV is more complicated than washing a car, truck, van, or SUV. You can’t just go out and start washing it like you would wash a regular vehicle - you need to have a strategy. You may even need to get someone (or several people) to help you, especially if your RV is a huge class A motorhome.
You’ll also need to get the right cleaning products for your rig. Consult your owner’s manual to see the kind of cleaning products the manufacturer recommends. Some RVs have decals that can be easily damaged by certain types of RV cleaning products. Painted metal surfaces can be washed using the same cleaning products that you would use on a car, while for fiberglass surfaces, it’s largely recommended that you use a cleaning product that both washes and waxes the surface.
Also worth noting is that you need a lot of water to wash an RV. It’s better to wash it in your own backyard or driveway, where you can give it all the water it needs to get clean without being reprimanded by anyone. The washing should also be done on a firm surface that can take your weight and that of a ladder.
Also, don’t start with the sides, as the runoff from the roof can cancel out your efforts as it flows down the sides. Always start with the roof.
NB: It’s possible to use a pressure washer to wash an RV, but unless you really know how to use it, you’re better off avoiding it. Pressurized water can cut through silicone seals, blow past gaskets, or pass between overlapping layers into the RV. It can even peel off decals if not handled with care.
Washing An RV: The Material List
- Decon Soap + Wash Mitt
- Mirror Shine - Get 15% off!
- Plastic Restore
- High-Gloss Tire Shine Spray
- A ladder
- Two large buckets
- Soft-bristle brushes with long or extendable handles
- Hard-bristle, hand-held brushes for the wheels and tires
- Garden hose with a sprayer (or pressure washer if you have one)
Step 1.) Wash The Roof
Torque Detail’s Decon Soap can be used to wash metal or fiberglass roof surfaces. If your RV’s roof is made from rubber material, check your owner’s manual to see which type of cleaning product it requires. Before climbing up onto the roof, fill one bucket (that we’ll call the soap bucket) with some water and then add an appropriate amount of Decon Soap (or the soap recommended for your roof) to the water (check the recommended mixing ratio on the side of the Decon Soap container). Fill another bucket with water (the rinse bucket). After that, grab your garden hose with its attached sprayer, your soft-bristle brush with a long/extendable handle, the rinse bucket, and the soap bucket, and climb onto the roof of your RV with the help of a sturdy, self-supporting step ladder.
Start by inspecting the vents and all other features that are mounted on your RV’s roof, checking to see whether the seals around those features are completely intact. If they’re still in good condition, you’re good to go. Spray water onto a portion of the roof to soften and wash off loose dirt, dip the soft-bristle brush into the soap bucket, and gently scrub that portion of the roof. Once you’re done, hose down that portion with plenty of water from the garden hose and rinse the long-handle brush in the rinse bucket. After that, proceed to the next portion of the roof and repeat the process.
It can get awfully slippery with all the soap and water on the roof, so make slow and well-calculated movements to avoid falling. You also need to put on shoes with non-slip soles.
Not all RV roofs are made the same. If the roof isn’t strong enough to bear your weight, you’ll have to do the washing from your ladder. Your long-handle brush will help you get to hard-to-reach places.
By the time you’re done with the roof, the soap bucket will probably be saturated with dirt. You’ll need to pour out that soapy water and get a fresh mix of soap and water before continuing - otherwise, you’ll end up transferring dirt from one surface to the next. As you continue washing the RV, keep changing the soap-to-water mixture every time you notice that the soap bucket has gotten saturated with dirt. You’ll probably need to do this several times before you finish the entire cleaning process.
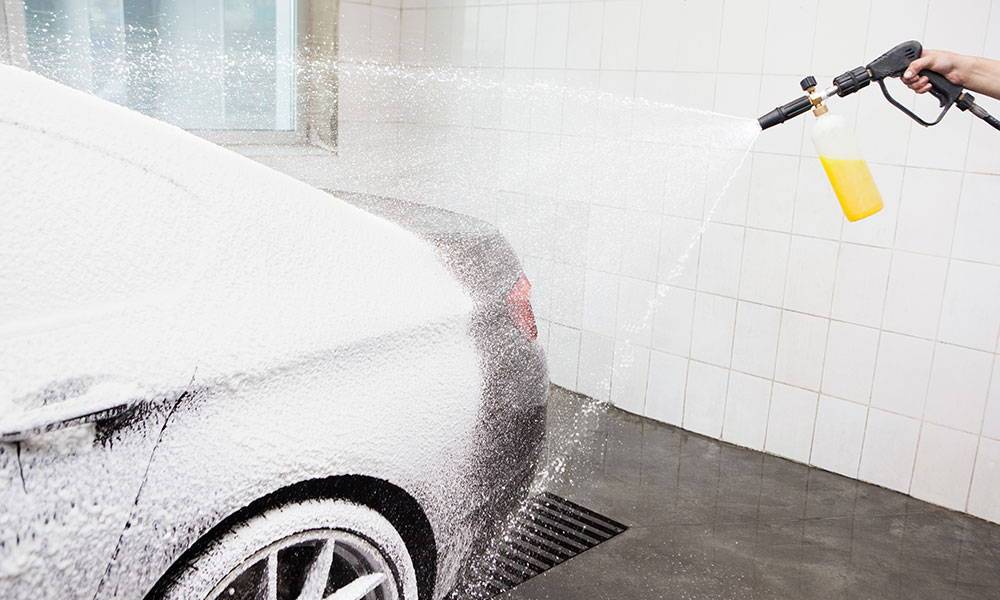
Step 2.) Wash The Sides
For the sides, spray one side of your RV with plenty of water to soften the dirt and debris, then dip a soft sponge or wash mitt into the soapy water and use it to gently scrub that side of the RV. You may have to do this while perched on your ladder. For hard-to-reach areas, use the soft-bristle brush with the long handle. Once you’re done with that side, rinse it with plenty of water, move on to the other side, and follow the same procedure. Always work from the top downward.
★★★★★ "Saw this being promoted on a big YouTube channel and thought why not try it. Was a bit skeptical but WOW. Super easy to apply and car is shining. Water still pelts off 3 weeks later! Gonna ditch the wax and will continue to use." - Josh S.
Step 3.) Clean The Awnings
Most awnings are made from vinyl or fabric materials, so you need to use the recommended cleaning products to wash them. When doing so, draw them out from where they’ve been stowed, wet them with some water, then gently scrub them with soap using a soft sponge or wash mitt. After that, rinse them with plenty of water from your garden hose and leave them stretched out to air-dry. Don’t stow them back until they’ve dried completely.
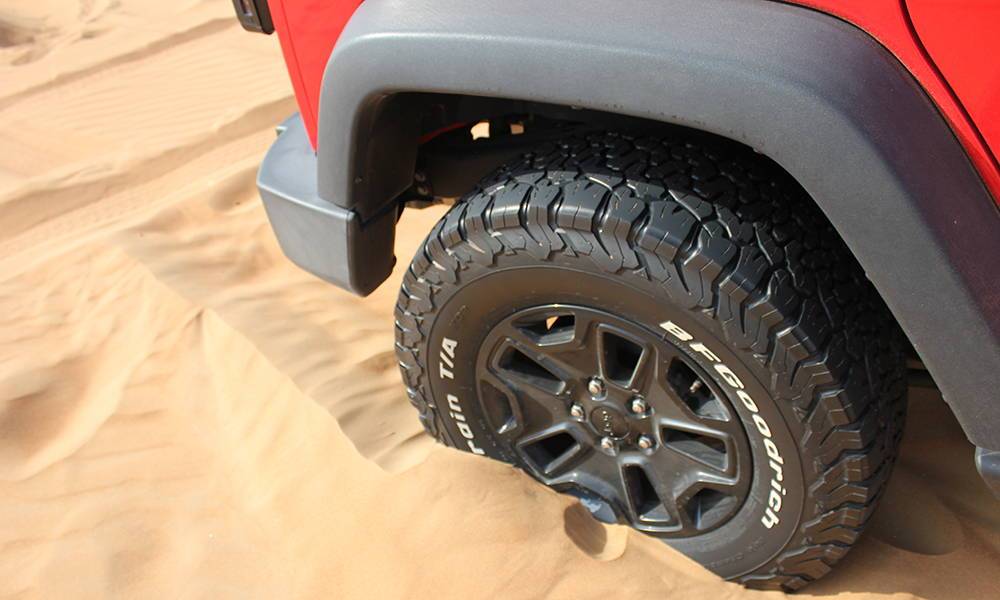
Step 4.) Wash The Wheels And Tires
You can also use Torque Detail’s Decon Soap to wash the wheels and tires of your RV. First, spray the wheel and tire with water to soften and dislodge some of the dirt. After that, dip a hard-bristle wheel brush or a wash mitt into your soap bucket and use it to scrub every square inch of the wheel and tire. Then, rinse the wheel and tire with plenty of water. To make the tires look even better, apply Torque Detail’s High-Gloss Tire Shine Spray, which brings out a deep, jet-black tire shine while also providing UV protection.
Step 5.) Dry Off The RV
You may have missed a few spots when washing the exterior of your RV, especially in the areas where you used the long-handle brush. The surface runoff from the roof may also have left white drip lines on the sides of the RV. To remove the above and get rid of any water spots, it’s best to do the drying of your RV by hand.
Damp microfiber towels have been proven to be more absorbent than dry microfiber towels, so dip your microfiber towels in clean water and wring them out to remove excess water. After that, wipe down all the sides of the RV, going section by section. When a microfiber towel gets saturated, get a fresh one and continue until you’ve dried off the entire RV.
Step 6.) Wax The RV
Torque Detail’s Mirror Shine is both a wax and a sealant. It has better protective qualities than the typical carnauba wax and is the best RV wax we can recommend. It brings out a deep, high-gloss shine while also applying a layer of protection to the RV’s surface. Applying Mirror Shine is easy - simply spray the product onto a section of the RV’s exterior, give it a minute to bond with the paint, and buff off any excess fluid using a clean microfiber towel. After that, move to another section of the RV and do the same. You can also use Mirror Shine on the windows and wheels of your RV.
Step 7.) Recondition The Rubber Seals And Gaskets
Special care must be given to the rubber seals and gaskets that surround the doors, windows, and sliding sections. These rubber surfaces can dry up when left unprotected for extended periods, leading to cracks and tears. Torque Detail’s Plastic Restore can help to restore those rubber gaskets and seals. This product permeates deep into the rubber and changes its molecular structure, bringing it back to its original state.
Some Tips To Remember When RV-Washing
Here are some of the things you need to keep in mind when washing your RV.
Wash And Wax On A Regular Basis
Just like regular cars, RVs leave the factory with a protective coating that helps to protect their surfaces from the elements and other contaminants. However, when continually exposed to the sun and elements without additional protection, this coat wears down quickly. Also, the longer you leave dirt and grime to collect on the surface of your RV, the quicker the protective coating wears down. When this protective coating wears off, your RV’s body is left vulnerable to water damage, rust, and oxidation, and you don’t want that! Washing and waxing your RV regularly will help to maintain that protective coating. The washing process gets rid of dirt and grime that may have burrowed into the coating, while the waxing replenishes the protective coating and leaves a high-gloss, long-lasting shine.
Waterless Detailers Are Great
Waterless detailers are worth considering, especially when you have a limited supply of water or are staying on camping grounds that don’t allow RV washing.
Torque Detail’s Turbo Waterless Detailer 5 Bottle Bundle is a fine example of a waterless detailer that you can use on your RV. It won’t dry out your RV’s protective coating and thanks to its anti-static properties, it repels dust and dirt. This waterless detailer is also infused with ceramic, so it leaves a high-gloss, hydrophobic, and long-lasting coating that helps to prevent scratches and UV ray damage.
When applying the Turbo Ceramic Waterless Detailer, just spray it on a section of your RV’s body and wait a few minutes for the detailer to encapsulate and lift the dirt from the surface. After that, use a clean, damp microfiber towel to wipe off the dirt and any excess detailer fluid from the surface. Finally, buff to a deep shine. If necessary, you can repeat this process to ensure you get all the dirt off the surface of the RV. After that, move to the next section of your RV’s exterior and repeat the process. Continue doing so until you’ve cleaned all the sides of the RV.
Don’t Wait To Clean Off Bug Guts
If it's going to be a while before you get to wash your RV, you shouldn’t wait to clean off the bug guts that have splattered across the front with the rest of the RV. Those bug guts are acidic, so they can eat into the RV’s protective coating. When you notice them on the RV’s front end, scrub them off using the recommended washing soap and a wash mitt.
Why Our RV'ing Customer's LOVE Mirror Shine
Jim T's Mirror Shine Review
"This is my Torque story and I'm sticking to it, even if it does sound like an ad.
We were work-camping in the Grand Tetons this past summer. Dust and pine sap get all over your camper and truck out there. I would have to scrub and wash the truck at least once a week just to keep the sap and dust off. much less the bugs, and I do mean giant bugs. I saw an ad for Torque and decided to try it. I bought two bottles of Ceramic Spray. I put two coats on the camper’s front and two coats over the entire truck, plus some extra on the front. The results were really great. Sap would no longer stick and I could just wipe it off with a paper towel in one swipe. The dust would fly off as I drove home from work each day. Bottom line, the camper and truck stayed clean the entire last month we were there. Nothing stuck to them. Our drive home was 2,341 miles and 6 days of stays in different campgrounds along the way. Everything stayed clean. When we got home, I just did a light pressure wash to clean off the bugs and all was shining again. The bugs didn’t have a chance to stick.
In full confession, I did use the entire two bottles of product, and a lot of it went on as extra coats on the places where I knew bugs and grime would hit the truck and camper worse. My idea worked and Torque worked like a charm.
I just did our truck again plus both cars in double coats of Torque Ceramic Spray after clay baring each. It's been a week and I just found bird droppings on the hood of my truck, which flew off after a few miles down the highway. This Torque stuff is really amazing. Water beads off all our vehicles and touching them feels like smooth glass. Torque is for real.
Notice in my picture the brake dust buildup from the 2,341 miles driving home. Wish they could come up with a way to clean and stop the brake dust buildup.
Ceramic Spray shone the big test. Product is amazing and was up for the challenge. Put one coat on, waited 24 hours, and put a second coat on. Then we hit the road for 10 days and 2,800 miles of highway bugs, rain, black streaks, and sunshine. On the tenth day, did a neutral pH-balanced wash and rinse. I believe the picture says it all. No special attention was given to the bugs or the black streaks. That was very impressive."
Torque Happy Customer
Jim T.
★★★★★ "Saw this being promoted on a big YouTube channel and thought why not try it. Was a bit skeptical but WOW. Super easy to apply and car is shining. Water still pelts off 3 weeks later! Gonna ditch the wax and will continue to use." - Josh S.
Summary - Everything You Need To Know When Washing Your RV
One key takeaway from the above guide is the fact that washing an RV is way more challenging than washing a car or truck. It takes time, so you’ll need to set aside a few hours to get it done right. Depending on the size and design of your RV, you may need to incorporate different washing techniques. Also, don’t forget that you’ll need to use the right (or recommended) products for the different materials of your RV, e.g. rubber and fiberglass - regular car wash soap or dishwashing soap just won’t do.
If possible, doing a waterless wash will save you a lot of time and resources, and will also be cheaper. Other takeaways are that you must wash your RV regularly, and that you need to do so using high-quality washing and detailing equipment.
I help run the day to day for America's Number #1 Car Wax Mirror Shine by Torque Detail. As a Certified Detailer by the International Detailing Association, I use that knowledge to help create products that get professional grade results with super simple application techniques.