Purchasing your first motorcycle is an exciting time for bikers, but for many it can be daunting too! Even though motorcycles are so very different from cars, you’ll be surprised that when it comes to a motorcycle wash, you pretty much follow the same steps as a car.
So in this article we will go over how to put in some elbow grease to your wash and wax your motorcycle with cleaning products, because the only thing better than riding is riding clean as a car wash!
Torque Detail Graphene Burst Spray Coating
★★★★★ No more washing & waxing each month. Our formula is extremely hydrophobic; your car repels water and keeps dirt & debris from sticking. Provides a minimum of 6 months protection and typically lasts for over 12 months.
How To Wash A Motorcycle (Your First Wash & Wax of The Year)
Maybe you just bought a brand new bike or a bike new to you? Just like buying a car, It's always good practice to perform some maintenance items like oil changes or brake dust cleaning. Because at the end of the day you don't know what the previous owner used or didn't use. The same goes for your paint, chrome, and plastics. We want to make sure to completely clean your motorcycle and add some fresh quality protection so your finish will last years!
Step 1.) Decontamination Wash
★★★★★ The Decon Wash Pack will strip previous coats of waxes and sealants, as well as remove surface contaminates. Your vehicle's surface is filled with contaminants. Some of these may be visible, such bug guts, bird droppings, water spots, and tree spots. And some contaminants, such as iron deposits, brake dust, and overspray may not be visible to the naked eye.
The decontamination stage is the foundation to any detail, it makes sure that the vehicle is completely clean and stripped of any old waxes and oils that might get in the way of the fresh quality protection you will apply in future steps.
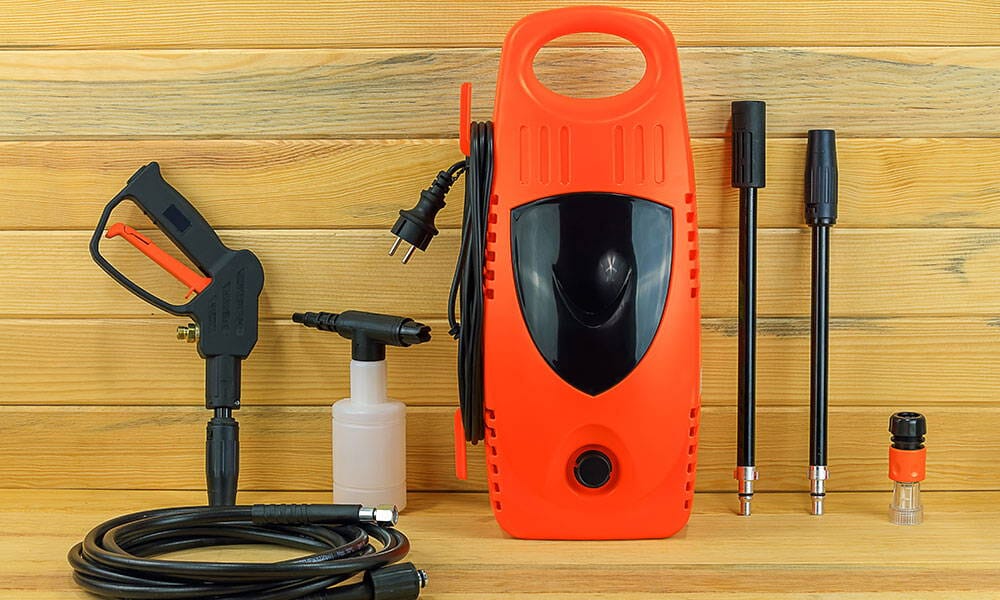
First things first fill up a 5 gallon bucket with about 4 gallons of cold water. After that pour 4oz of Torque Decon Soap in your 5 gallon bucket and foam it up with your garden hose or high pressure washer. You’ll notice Torque Decon Soap studs up really well, this will provide you great cleaning power and lubricity while washing your motorcycle. Rinse off your motorcycle with a gentle stream from your clean water source, then soak a clean microfiber cloth, other soft cloth wash mitt in your soap and start washing.
Almost all modern motorcycles are waterproof or resistant, so you won't have to worry about getting anything wet. But of course always use caution on older motorcycles that could have been modified with exposed wiring. Continue washing your motorcycle making sure to grab fresh decon soap from your bucket as needed. To avoid letting the soap dry on your motorcycle make sure to rinse the bike as needed throughout the wash. Detailing brushes are also great tools to get the gunk out of the nooks and crannies like wheel spokes and your motorcycle’s hot engine bay, a toothbrush would also work! You can use your detailing brushes in combination with your decon soap to clean off all these areas after washing your motorcycle. After everything has been cleaned perform one last thorough rinsing session to make sure to wash away all the dirt and soap and then dry your motorcycle with a quality microfiber drying towel. A leaf blower is also great to push out water spots from all the nooks and crannies.
Step 2.) Clay Bar the Motorcycle
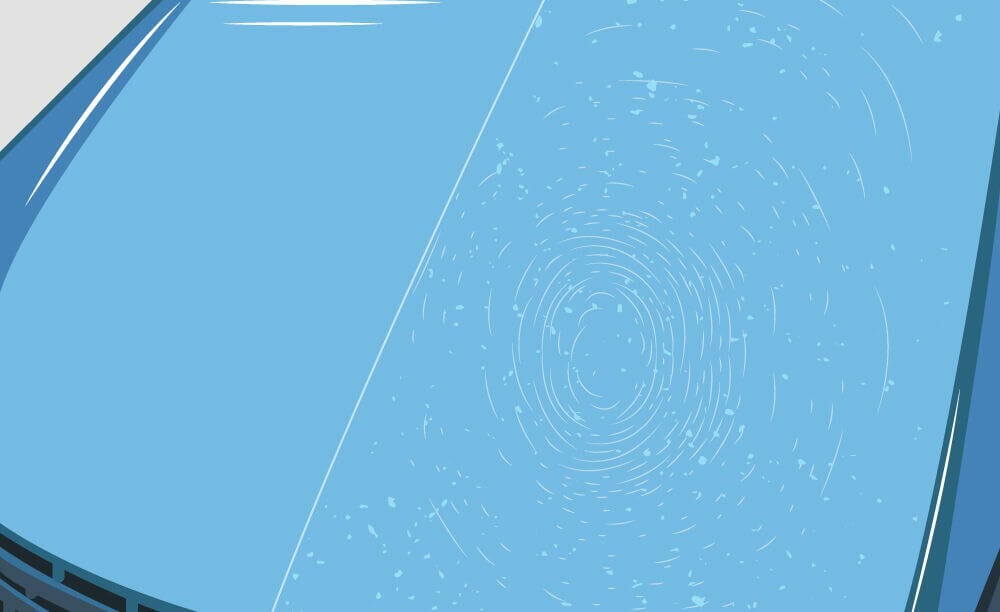
So now that we have stripped all the old oils and waxes from your motorcycle, we move on to the next step which is removing embedded contamination. Paint and chrome is just like skin, it has pores and cracks that over time get filled up with dirt and grime creating a rough surface. So just like exfoliating the pores of your skin we have to clay bar your motorcycle. The clay bar will latch on to all the embedded dirt and grime and remove it from the surface leaving a nice smooth finish. We recommend using the Torque Detail Clay block Kit, because it uses the highest quality synthetic clay that can be used over and over again providing you the best possible results.
All you need to do is spray the clay lube that comes with the kit onto the surface of your motorcycle's paint and chrome. Then grab the clay block and lightly rub it across the sprayed surface in a straight line and cross hatch motions. You’ll notice the surface become slicker as you continue to clay. Repeat this process across the painted and chrome areas of your motorcycle making sure to wipe away the clay lube after each pass through.
Step 3.) Paint Correction
Now that your paint is perfectly clean you might notice some scratches or swirl marks around your motorcycle. Swirl marks and scratches happen overtime because of improper washing and care, not only do they look bad but they also diminish your motorcycle's gloss and shine. The only way to permanently remove swirls and scratches is with paint correction or otherwise known as polishing.
Since we’re polishing a motorcycle which has little surface area, we don't really need large tools such as DA polishers. All we’re going to need is a few microfiber applicator pads, some microfiber towels, and a bottle of Torque Detail Reverse Scratch Remover. Pour a few pea size drops of the scratch remover on to your applicator pad, then evenly spread it on a small section of your paint. Then rub the polish with medium pressure in cross hatch circular motions making sure to overlap your sections. Check your results by wiping the excess polish with your microfiber towel, and use a flashlight to find any further swirl marks. Repeat this process around the motorcycle until satisfied.
Step 4.) Shine & Protect
Torque Detail Graphene Burst Spray Coating
★★★★★ No more washing & waxing each month. Our formula is extremely hydrophobic; your car repels water and keeps dirt & debris from sticking. Provides a minimum of 6 months protection and typically lasts for over 12 months.
Now it’s time to protect all that hard work! There are many forms of protection on the market like traditional waxes, but by far the longest lasting would be a ceramic coating like Torque Ceramic Spray. Ceramic Spray is an easy to use sprayable nano ceramic coating that makes a durable protective layer around your vehicle lasting a year! Not only does it protect your motorcycle from the environment it also adds the highest quality gloss and shine making your bike look like glass.
All your going to need is a bottle of Torque Ceramic Spray and a couple of new microfiber towels. Mist the Ceramic Spray on to your first microfiber towel, and then mist the product on to a small sedition of your motorcycle. Then buff the product in making sure to evenly apply it around the area. Then using a fresh microfiber towel buff off the Ceramic Spray residue. You'll immediately notice an increase in gloss and slickness after application. Continue this process around the vehicle including your chrome, glass, and even plastic surfaces!
How to Wash a Motorcycle AFTER you Have Already Waxed It
One of the biggest benefits after waxing your motorcycle is how easy it is to wash and maintain. Since your paint, glass, chrome and plastics are protected they stay cleaner longer and also become super easy to clean, so there is no need to use a decon soap or a clay bar until your next major detail. So for example if you use a clear coat on your motorcycle with Torque Ceramic Spray you won’t have to perform a decontamination stage or clay bar service for a full year as long as you are properly washing your vehicle during the waxes or coatings life cycle.
All you have to do is to perform a maintenance wash with a quality PH neutral car soap or a waterless wash like Torque Ceramic Waterless Detailer. Regular car soap is great, but what ceramic waterless detailers do that regular car soaps don't is clean and add even more protectant as you wash. This will make your initial application of Ceramic Spray last even longer, not to mention it’s as easy as spray on a wipe off with a quality microfiber towel!
"Torque Detail Turbo Ceramic Waterless Detailer is quick and easy to apply. I was very impressed with the results. My bike shines with a quick wipe down!" - Jon C.
Cleaning A Motorcycle’s Gas Tank: Our Top Tips
A motorcycle's Gas Tank is an eye catcher so it's super important to make sure it looks spotless! Here are our top tips to keeping you gas tank looking new:
- Leaf Blower: A leaf blower will help blow out any excess water that gets stuck at the bottom of your gas tank or at the top of your gas cap. This will help reduce any mineral build up from hard plain water and also prevent rust in salty climates.
- Tank Pads: If you have a sports bike or a motorcycle that you lean over very frequently, we recommend tank pads. Tank pads are adhesive pads that stick to high friction areas of your tank to avoid scratching. This will keep your tank looking new for longer.
- Waterless Wash & Towels: Always keep a bottle of Ceramic Waterless Wash and a couple microfiber towels in your motorcycle. Just in case you're on the go and you need to shine your bike up real quick before a show or safely remove bug guts.
Restoring Leather and Vinyl Motorcycle Seats
★★★★★ "Have always used Lexol in past with good results but Torque product much better and works on all interior pieces ..have a 93 Corvette and seats are in good condition but now really nice look..can't attach pic but take my word.
.actually you can't go wrong with any of Torque Products" - Gary G.
Majority of new motorcycles use a form of pleather or in other words Faux leather for seats and storage areas. The reason why is because it's much cheaper, just as durable, and easier to maintain compared to genuine leather. But there are still many higher end manufactures using genuine leather on their more premium offerings, so it's always nice to know how to clean and protect both!
An easy way to tell if you have faux leather or genuine leather would be by examining the edges of the seams. Typically fake leather seams are rolled to hide the synthetic fibers, while genuine leather edges are exposed to show the quality of the leather. Another way is to feel the material, real leather feels soft and grainy to the touch while fake leather feels super smooth and artificial. If you’re still having trouble figuring out what you have no biggie, call a local dealership and provide them your motorcycle's VIN number. They should be able to provide your motorcycles specs and materials with that information.
Now that we know our material type we can start the restoration process. If you have genuine leather on your motorcycle, start by cleaning the seat with Torque Intra Clean, this will remove the years of dirt and grime from the pores of the leather. After that grab a bottle of Torque Leather Restore and mist it evenly across your leathers surface, then buff off with a fresh microfiber towel. Leather Restore will apply the natural oils that your leather needs to stay soft all while adding polymer protection to avoid fading from the direct sunlight.
Restoring Faux Leather is very similar to genuine leather, but rather than using Torque Leather Restore we would use Torque Plastic Restore. Just spray plastic restore on your faux leather seat and wipe off with a microfiber towel. Now your faux and genuine leather is clean and protected!
Washing and Shining your Motorcycle Helmet
Now that your motorcycle is looking great we can focus a little bit on your accessories, the most important being your helmet! Your helmet is the most important safety feature while riding your motorcycle but it’s also super expensive, so keeping it clean and protected is a priority.
Starting with the inside of the helmet, remove the interior fabric liner and safety pads. Over time these can collect dirt and bacteria causing irritation to your skin, so it's best to keep them clean at all times. Most interior liners and pads are machine wash safe, if they are not, wash them by hand in a small bucket of warm water or soapy water with lots of suds and your preferred laundry detergent. Make sure to let the interior liners air dry after being washed to avoid shrinking, after they are dry place them along with your safety pads securely in your helmet.
The exterior of your helmet can be treated very similar to your motorcycle's paint, so adding it to your motorcycle maintenance is a great idea! First clean your motorcycle helmet with Torque ceramic waterless wash, this will remove all the dirt and dust off the surface preparing it for our next step. After your helmet is clean apply a few mist of Torque Ceramic Spray and buff off with a clean microfiber towel. Now your helmet is clean and protected inside and out!
While You’re At It: Lubricating Your Motorcycle Chain
Cleaning and lubricating your motorcycle chain is another great thing to add to your maintenance cycle. Depending on your motorcycle we recommend cleaning and lubricating your chain every thousand miles. Of course prior to cleaning your chain make sure your bike is off and in a stable possession to work on.
Start off by cleaning your chain with a dedicated motorcycle cleaner and a brush. Make sure to work your way around the whole chain to loosen up the old lube and dirt. Then take an old microfiber towel and wipe the dirt and lube away. You can repeat the cleaning process until you're satisfied.
After the chain is clean grab a can of your bikes recommended low sling motorcycle chain lube and apply it on the surface of the chain. Make sure to get a heavy coat on the whole chain for complete coverage, then wipe off any excess to avoid slinging.
Torque Detail Graphene Burst Spray Coating
★★★★★ No more washing & waxing each month. Our formula is extremely hydrophobic; your car repels water and keeps dirt & debris from sticking. Provides a minimum of 6 months protection and typically lasts for over 12 months.
Summary - Everything You Need to Know About Washing a Motorcycle
Just like everything in life consistency is key! Maintaining your motorcycle is a pretty simple process with a spray cleaner, just follow all the steps and take your time. Making sure to regularly wash and perform maintenance such as cleaning your helmet for optimal visibility and lubing your chain will provide you the best riding experience!
I help run the day to day for America's Number #1 Car Wax Mirror Shine by Torque Detail. As a Certified Detailer by the International Detailing Association, I use that knowledge to help create products that get professional grade results with super simple application techniques.