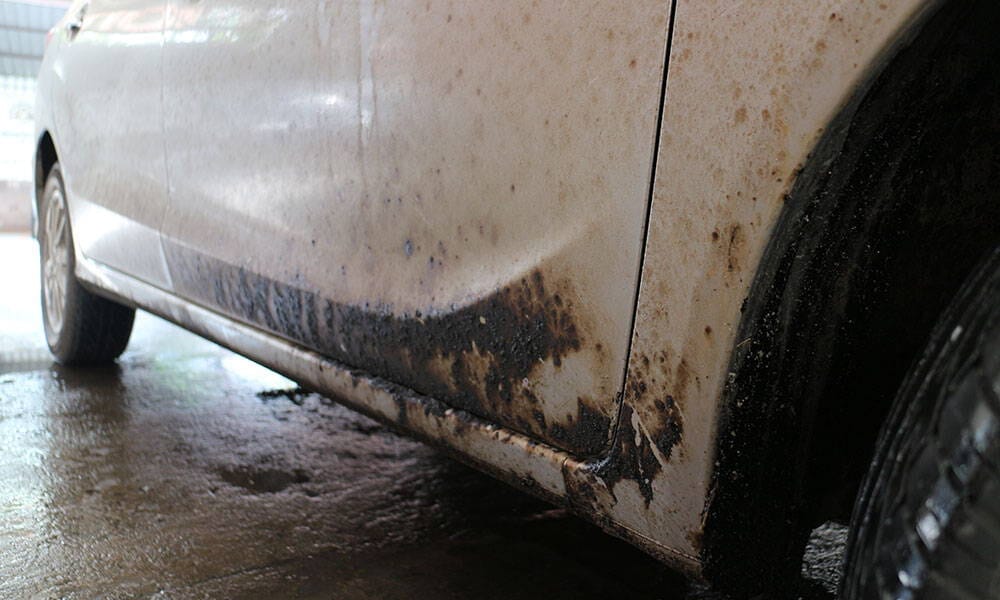
Dark, ugly spots sprayed all over your wheel wells, arches, and sills? If it’s stuck on like super glue and refusing to budge, it’s probably tar.
If that sounds familiar, then there’s some good news and some bad news.
The bad news: It is gonna need some elbow grease to remove this black colored gunk from the affected areas.
But, the good news is: With the right technique and tools and some power from your hands, using some commercial products too, you’ll get the job done in half the time of anyone else!
★★★★★ The Decon Wash Pack will strip previous coats of waxes and sealants, as well as remove surface contaminates. Your vehicle's surface is filled with contaminants. Some of these may be visible, such bug guts, bird droppings, water spots, and tree spots. And some contaminants, such as iron deposits, brake dust, and overspray may not be visible to the naked eye.
What is Tar And Why is It a Problem?
Real tar is a natural substance, generally made from wood or coal. In the old days, it was an essential ingredient in road-making. These days it has widely been replaced by modern alternatives. Today, what we still call tar - that black, sticky substance that glues roads together - is usually a petroleum-based bitumen.
But, let’s be honest, if the problem is the same, we don’t really care what it’s made from!
The problem with tar spots (let’s just call all of this stuff ‘tar’) is that what makes it so useful for binding road tar surfaces is also what makes it such a menace for your ride: It sticks like glue!
The result? Black, bumpy spots all over your ride’s bodywork, front doors and side doors.
But the problem is not just the visible black spots. Tar contains harmful contaminants that can cause discoloration or corrosion.
So, here is your guide on how to:
- Remove tar and prevent it from doing any permanent damage.
- Protect your ride in advance: Get ahead of the game and stop tar from ever getting a foothold.
The Number 1 rule for dealing with tar.
No matter what method you use to get rid of tar, there is one crucial factor to bear in mind: Time.
The sooner you clean that tar off, the easier it will be. We know it’s tempting to leave it until later, but trust us, you want to get rid of it ASAP!
Sunlight and air will cure the tar and bind it to your paintwork. Once cured, it will take twice as long to remove, and the risk of it leaving stains increases dramatically.
Let’s Get Down to Business - Is a Clay Bar Kit Necessary?
For tough tar, this is the full-fat solution.
Clay bar gives paint and wheels the ultimate decontamination. Typically, we use it for a deep clean when we want to eliminate every last particle of potentially harmful grime. We can then reapply the sealant or ceramic coating, knowing that we’ll get a million-dollar finish.
If tar is proving hard to shift, clay is your secret weapon. Its deep cleaning properties are highly effective at removing this cement-like gunk. And, the invisible but potentially harmful residue that tar leaves behind doesn’t stand a chance!
But before you rush off and set to work with the clay, there are some things to be aware of:
- Clay will strip your wax/sealant/ceramic coating with light pressure. So, you will need to reapply your chosen product after you’re done.
- It’s a relatively aggressive cleaning method. That means it gets impressive results, but only by being harsher on your paintwork. Only use clay very occasionally for a deep decontamination, or when all other attempts to remove dirt and splatters have failed.
So, if you’re just starting out, read a little further and try options #1 and #2 first.
But, if you’ve already tried to remove the tar and it isn’t budging, then check out our full guide on how to use clay here. We promise that you’ll get fantastic results!
The Best Ways To Remove Tar From Your Car
Hopefully, the problem isn’t so bad that you need to use clay. Listed below are the best tar remover methods for most cases.
#1 - The Detailer’s Swiss Army Knife: Turbo Waterless Detailer
We admit it... This is a product that we are incredibly proud of! Turbo Waterless Detailer gives you the power to deal with ugly and potentially harmful dirt such as tree saps and contaminants any time, anywhere. Tar, dirt, bug guts, bird droppings? No problem.
Just keep the bottle and a microfiber towel in your car. Then, when disaster strikes, give the grime a few quick sprays and a wipe down. The powerful formula will break down the dirt and leave a super high-gloss protective coating behind.
We keep a bottle in the car, so it’s always on-hand for when we need it most. Having the tools to deal with tar or other contaminants before they have done real damage to your ride is a game changer!
Turbo is also great for giving your ride a full waterless wash.
#2 - Decon Soap - For Hard To Remove Tar
★★★★★ The Decon Wash Pack will strip previous coats of waxes and sealants, as well as remove surface contaminates. Your vehicle's surface is filled with contaminants. Some of these may be visible, such bug guts, bird droppings, water spots, and tree spots. And some contaminants, such as iron deposits, brake dust, and overspray may not be visible to the naked eye.
Ok, so that tar has been stuck on for a while and is proving hard to shift?
Time to increase the horsepower!
The second option is Torque Detail Decon Soap.
Super powerful, car paintwork-specific, and a killer on tough tar. Remember we mentioned harmful contaminants earlier? Decon Soap is purpose-built to boost the power of a regular car wash soap and blitz more contaminants than any other wash product available!
You use Decon Soap just like a regular car shampoo. Here’s a full guide on how to give your ride a proper wash.
To deal with tar, you’ll have to put in some extra elbow grease. Soak all the tar in your mixture of Decon Soap and water, and then use a clean microfiber towel to gently work the mixture into the tar. It might take some time, but keep scrubbing the tar until it lifts away.
If your wax/sealant has been contaminated or discolored, then Decon Soap will work wonders. It strips these coatings back to the paint’s original clear coat, so you can start fresh.
Of course, you might not want to strip the wax or sealant back! Unfortunately, if the tar problem is bad enough that other methods, like Turbo Waterless Detailer, have failed, then it’s probably the only option.
A great way to maximize the results is to combine Decon Wash with clay. This will give your ride a full, 5-star decontamination, and you’ll know that every last harmful particle is gone. If you’re serious about protecting your ride and getting it looking its best, this is the way to go.!
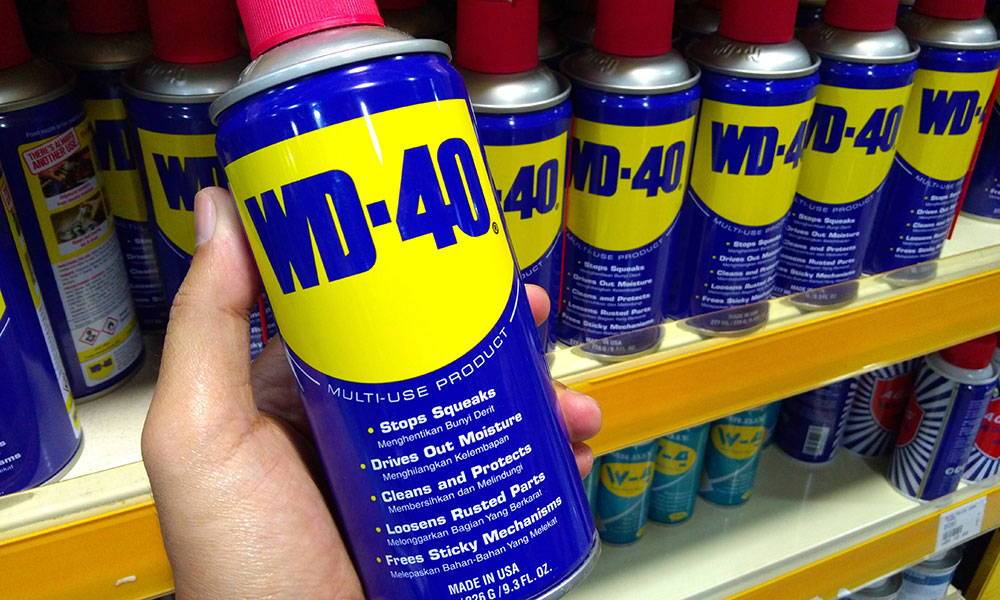
#3 - WD-40 - The “Good Enough” DIY Way
Good old WD-40! Who doesn’t have a can of this lying around somewhere at home!?
In a pinch, use WD-40 to get the job done as opposed to any home remedies as weaker household products. The chemicals in the liquid should slowly break down the tar and allow it to be wiped away.
How to use:
Spray the WD-40 onto the tar and allow it to soak in for a minute. Then take a microfiber cloth, soft cloth or any other damp cloth and a mitt if necessary, then start scrubbing the tar away. After a little work, it should begin to lift off.
Sounds like a great solution! But what’s the catch!?
Sadly, WD-40 is a less than ideal removal product. It is safe on paintwork, but it is not guaranteed on waxing or sealants. So, unlike with Turbo Waterless Detailer, you may have to reapply these finishes. It will also leave your ride greasy and smelly, so a full wash afterward is essential as a full degreaser! Finally, unless you and your passengers don’t mind your car’s cabin stinking of WD-40, there is no way you can keep it with you on the road! This stuff needs to stay in the garage!
How to Prevent Tar Build Up
So, now we know how to get rid of that tar! But prevention is always better than a cure. Instead of doing damage limitation, why not get ahead of the problem in advance?!
The way to stop tar from getting a greasy grip on your paintwork is to protect it with a rock-solid shield.
Ceramics are one of the hottest topics in the modern auto-care industry for a good reason! They are the best way to protect your ride. Period. Tar, UV, dirt, swirl marks, pollen, iron deposits. You name it, ceramics will take the damage so that your car’s paint doesn’t have to. And, as a bonus, it will give your paint job an unreal-looking shine!
Traditionally, ceramic coatings took hours to apply. It was a professional job, with a price tag to match. But technology moves on! After a long time in development, we have finally formulated a ceramic coating that can be applied at home, just like a spray wax. Check out Ceramic Spray here. And remember, we stand behind every bottle we make with our 100% satisfaction guarantee!
Summary
From potholes to scratches, there is a lot out there to damage your car and tar has a reputation for being a particular nightmare. But, if you know the right way to deal with it you’ll wonder what everyone is complaining about!
Getting ahead of the problem with a super tough ceramic coating is half the battle. And being ready to handle tar stains in real-time with Turbo Waterless Detailer is the other half. Between the two, you’ll have the ultimate combination of long-term protection and quick response. There is no way that tar, or other contaminants, stand a chance!


