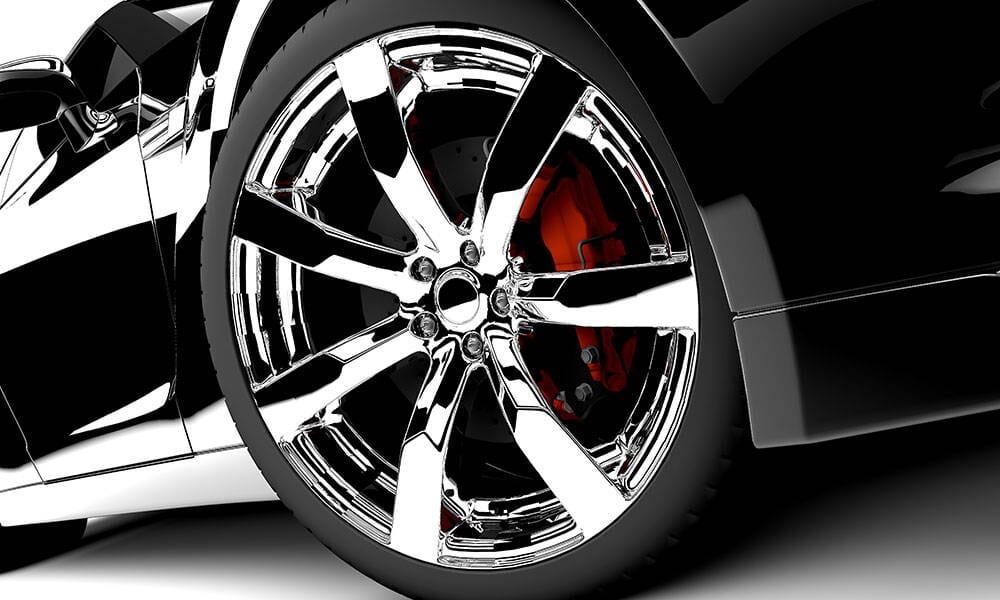
Wheels come in all shapes and sizes and can dramatically transform your vehicle, giving it an exciting, sporty, classic, or traditional aesthetic. It’s really admirable how we’ve managed to design thousands of variations of a round object.
The variety is further multiplied by no less than a dozen types of finishes. There are painted, clear-coated, powder-coated, anodized, diamond-cut, bare metal, and chrome wheels, many of which are available in different colors and gloss levels.
The majority of daily driven vehicles have painted or clear-coated wheels. These are cheaper, easier to maintain, and last for years with little degradation. If you have painted or clear-coated aluminum wheels, please visit our dedicated guide - How To Clean Aluminum Wheels.
When it comes to making an impression, perhaps dressing up a show car or a restored classic, it's the chromies everyone is looking out for. In this article, we’ll talk all about chrome wheels and how to maintain their brilliant mirror-like finish.
★★★★★ "My car is slick as glass!! I put the Ceramic Spray on my Corvette Stingray and it is very slick and shiny. I should have purchased it sooner. It is a great product. It made my wheels look new. Keeps off dirt and dust." - Charlie F.
What Are Your Chrome Wheels Made Out Of?
Wheel finishes have come a long way since the 60s. Chrome used to be the only fancy wheel option you could get. Today, not all chrome is the same. A variety of alternative techniques will produce a similar reflective finish - so much so that you can’t tell them apart just by looking.
Of course, the products and detailing strategies are different for each type of finish, so you need to make sure you’ve got the right setup to avoid frustration and disastrous results.
Already know everything about your wheel finish? Skip this section and dive right into the cleaning.
Chrome-Plated Wheels
Chrome plating is accomplished via an electroplating process. The alloy wheel is dipped into a chemical bath with a dissolved solution of the plating material - chrome or another metal. A current is run through the wheel and the solution, producing opposite charges in the wheel and chrome particles. The chrome particles will attract to the wheel and build up on the surface, eventually creating a uniform layer.
Sounds easy? It’s actually quite a complicated procedure, with a series of steps needed to produce a high-quality finish.
- The wheel is first stripped of all paints and coatings, then polished and buffed to a completely smooth finish.
- The wheel is then dipped into a chemical bath to etch the surface for the next stages.
- Most aluminum wheels are cast, which leaves a rough surface brimming with pores and imperfections. So, the wheel is plated in a layer of copper that fills in the cavities and produces a smooth finish.
- Next, two layers of nickel plating are applied. The first layer protects the underlying metal from corrosion, pitting, etching, oxidation, and other atmospheric conditions. The second produces a highly reflective finish.
- Finally, the chrome plating is created. This layer is reasonably hard and resistant to abrasion and scratches to some extent. It’s resistant to corrosion and most environmental hazards that wheels face on a daily basis.
There’s just nothing like a triple-plated chrome finish. The shine and reflectivity cannot be matched by any other process.
However, there are a few major drawbacks.
The chemical baths used for electroplating are extremely toxic. Specifically, the chromium used for the process is highly cancerogenic, damaging the lungs, respiratory system, skin, and eyes if exposed. The process is dangerous to the workers who perform the electroplating, as well as to the environment if waste products are released without treatment.
Even if you don’t care about all that, there’s still a performance hit to having your wheels chromed. Adding several layers of metal on each wheel comes with a weight penalty - usually 1-2 lbs for the set compared to painted or clear-coated wheels. That’s a fair amount of unsprung weight and rotational mass.
Is it significant? You decide. Chrome plating is nowhere to be found on racing and performance cars. On daily drivers, you can probably save more weight by cleaning your trunk, for example.
Finally, for all its strength, chrome plating is susceptible to acids and salts like the magnesium chloride used to de-ice roads during the winter. If you live in Massachusetts, you’ll have to wash your wheels frequently to prevent corrosion, or just swap a set of winter wheels altogether.
PVD Chrome - Physical Vapor Deposition
Nowadays, traditional chrome plating has tough competition in the form of PVD chrome. You’ll find this on most new trucks that come with “chrome wheels”.
PVD stands for physical vapor deposition. It works similarly to powder coating, but allows solid metals to be used as coating materials. The part is placed in a vacuum chamber that sucks out all the air and maintains a low-pressure environment. A solid piece of the chromium is vaporized - either through resistive heating or sputtering (ion bombardment). Once in gaseous form, the chromium atoms travel to the part, where they adhere and solidify into a thin uniform layer on top of the surface.
Powder coating is also used to apply a variety of base coats, primers, and the final clear coat.
PVD is perfectly harmless to the operators and the environment. There are no toxic chemicals used in the process and everything is contained within the chamber until completion.
PVD weighs about the same as powder-coated finishes, making it considerably lighter than triple-plated chrome.
Maintenance-wise, PVD chrome wheels are practically the same as painted or clear-coated wheels, so most commercially-available car soaps will do.
There’s no scratch resistance on PVD, unlike plated chrome. However, the protective clear coats are fairly durable and resistant to most kinds of chemicals, mild acids, degreasers, salts, and other contamination found on a daily basis.
★★★★★ "My car is slick as glass!! I put the Ceramic Spray on my Corvette Stingray and it is very slick and shiny. I should have purchased it sooner. It is a great product. It made my wheels look new. Keeps off dirt and dust." - Charlie F.
Polished Aluminum Wheels
In the case of aluminum wheels, you can simply choose to not use any form of coating and keep the metal bare.
Aluminum is easy to clean and polish at home and get an amazing finish. However, if we’re talking about a daily driven vehicle, maintaining bare aluminum wheels is certainly a handful.
While aluminum doesn’t rust like steel does, it does oxidate, forming a matte milky layer on top of the surface. It can’t eat through the metal and destroy the wheel, but it's unappealing and will require frequent polishing. You also need to stay away from any acidic cleaners, as they will react to the metal and leave a bad stain that only comes out through polishing.
If you don’t like spending time in the garage, you’d probably be better off choosing a different finish.
How To Clean And Restore Electroplated Chrome Rims
Electroplated chrome finishes are pretty durable. However, over time, you’ll find that the finish fades and the surfaces accumulate some pitting, water spots, lots of brake dust, and even some surface rust.
All these defects and contamination can be fixed fairly easily as long as the plating is not physically damaged.
Unfortunately, if your chrome plating is peeling or there’s a deep scratch that penetrates into the base metal, there’s no way to repair the wheel other than by stripping it down and replating it. There are touch-up kits with chrome paint that can seal the area and hide the problem, but never truly remedy it.
We recommend removing the wheel from the vehicle and detailing it separately. It’s easier and you’ll get better results if you go through the extra steps. Plus, if you’ve never taken your wheels off, we guarantee you the barrel will be caked with a thick layer of brake dust.
Here’s Your Shopping List:
- Non-acidic chrome wheel cleaner
- Soft brush
- Micro-polisher or cordless drill
- Chrome polishing compound
- Super fine #0000 steel wool
- Microfiber towels
Step 1) Rinse The Wheel To Remove Loose Dirt
Rinse the wheel with a garden hose or a pressure washer on a low setting to remove all the loose dirt and dust.
Step 2) Wash With Chrome Wheel Cleaner
The most important thing here is to stay away from acid wheel cleaners. Acids love bare metals and will immediately react, leaving a horrible stain at best.
Because the chrome layer is just 0.02 mils thick (that’s 0.02 thousands of an inch), it’s highly likely that a stronger acid will simply eat through the chromium and compromise the entire plating stack.
You definitely don’t want that, so make absolutely sure the product you purchase is safe to use on chrome, bare metal, and/or anodized finishes!
Otherwise, cleaning is fairly simple. Get the wheel wet and apply your product. Give it a couple of minutes to work its magic, then gently scrub the surface using a sponge and a soft wheel brush.
Once sufficiently agitated, rinse the wheel. A good tip here is to work in sections, like the front face, then the inner barrel, then the back face. Work in a shaded area and don’t let the product dry on the wheel.
The interior surfaces may require several passes to get all the grime out, but acknowledge that soap will never truly remove caked-on brake dust.
Step 3) Polish The Wheels
You’ll find that cleaning has removed a fair bit of dirt and contamination. The wheel will look brighter, but not nearly as reflective as you want.
Bust out your chrome or bare metal polish, the #0000 steel wool, and have at it. The polish will remove any surface rust, pitting, water spots, oxidation, baked-on brake dust, and other embedded contamination.
Just make sure the steel wool is the finest grade possible and that you test it on the inner barrel first. Anything harsher can leave fine scratches on the finish. If you’re not confident, just use a spare microfiber towel or microfiber cloth, but you’ll have to work harder to get the same result.
You can also use a handheld drill with the appropriate polishing attachment or a micro-polisher to get the job done faster. These work great on large surfaces like the inner barrel, but you’ll probably do a better job around the spokes by hand. We recommend getting the first wheel done by hand to get a feel for it, then switching to a powered machine if you want to speed up the process.
Wipe the area every couple of minutes and inspect your results, and polish until satisfied.
Step 4) Seal And Protect Your Chrome Wheels
Now that you have your wheels super shiny and reflective, you probably want to keep that look for a while. Going back on the road will quickly fade your hard work, so it’s best to coat the wheels and protect the finish before installing them back on your car.
We recommend a spray ceramic coating. These products combine the protection properties of traditional liquid ceramic coatings with the ease of use of spray sealants, and a durability somewhere in between.
Our product, Ceramic Spray, applies in minutes and cures within 24 hours to a thin, glass-like layer on top of the plating. It will keep dirt, brake dust, mud, water, and other stuff away from the chrome plating and prevent it from settling in. The surface of the coating is anti-static and hydrophobic, so any grime can be easily washed away with water or a mild car soap.
Ceramic Spray gives you up to 12 months of protection (probably half on wheels), and for $40, you can do the entire car and your chrome wheels.
Step 5) Torque Your Wheels
Don’t forget to torque your lug nuts properly when you’re reinstalling the wheels. You don’t want them flying past you on the highway! Check the rating and bust out the torque wrench.
How To Clean And Restore PVD Chrome Rims
As we already mentioned, PVD chrome is always clear-coated. Because a powder coating technique is used, the finish is stronger and has better adhesion to the wheel.
However, the chemistry is practically identical to the regular clear coat on factory wheels, so you can clean them in the same manner.
Here’s Your Shopping List:
- Painted wheel cleaner
- Soft wheel brush - the softest one you can find
- Full Decon Kit - Includes Decon Soap (which removes iron deposits), a clay pad (like a clay bar but better), clay lube, and a wash mitt
- Clear Coat Polishing Compound
- Micro-polisher or cordless drill
- Microfiber towels
Step 1) Rinse The Wheel To Remove Loose Dirt
This step is the same no matter what type of wheel you’re washing. Hose it down to remove any loose dirt, dust, mud, etc.
Step 2) Wash With Wheel Cleaner
The washing process is pretty much the same. Spray liberal amounts of wheel cleaner, give the product a few minutes, then lightly scrub with a soft brush and rinse off.
It’s important to note that clear coats are much more resistant to acids compared to chrome plating. Therefore, you can use a more aggressive, acid-based wheel cleaner on PVD chrome.
The clear is not invincible and you can still damage it if you pour concentrated acid and walk away. However, if you rinse it off quickly enough, you can worry less about your product choices. Most commercially-available wheel cleaners will do a decent job on PVD chrome. Still, watch out for those pH levels and get a product close to 7.
Make sure your brush is designed for clear-coated wheels. The finish is rather soft and any harsh bristles will leave nasty scratches on the surface. If you don’t trust your brush, use a sponge and/or microfiber towel.
Step 3) Decontamination
Since you can’t scrub that hard and you don’t want to use harsh acids if you can help it, much of the brake dust and bonded contamination will remain behind even after you wash the wheel.
Brake dust in particular is a tough opponent. Use an iron remover (in this case, we’ll be giving the wheel a wash with Decon Soap since it has iron-removing properties) and spray the wheel generously. If you pick one of the color-changing products, you’ll literally see the wheel bleeding the iron out of the surface and into the solution. If you’re using Decon Soap, you’ll have to mix the soap in water and use a wash mitt to apply it.
Use the brush again to lightly agitate the surface, then rinse off after a few minutes have passed. Repeat if necessary.
Next, use your detailing clay and some lube, going over the surface several times to pull off the remaining brake dust, mineral deposits, and salts etched into the clear coat.
You should find your wheels noticeably brighter and smoother after the decontamination pass. Finally, you’re starting to see some progress, but you’re not done yet.
If the wheel is wet, dry it with a microfiber towel.
Step 4) Polish The Wheels
Polishing clear-coated wheels and clear-coated body panels is pretty much the process. You can use the same paste and pads you use on the body.
Your rotary won’t do you any good, but with some elbow grease and patience, you’ll get great results. Polishing should remove any leftover brake dust, minerals, and the majority of light scratches on the wheels.
Notice that polishing compounds for chrome and clear coat are entirely different. You cannot use any steel wool or Scotch-Brite unless you plan on refinishing the wheel.
If the clear coat is peeling, or if there are deep gouges that penetrate through to the underlying chromium layer, there’s nothing you can do to fix the problem. The best you can do is polish out the affected area and seal it with another coating to limit more damage in the future.
Step 5) Seal And Protect Your Chrome Wheels
When it comes to protective coatings, there’s nothing better than ceramics. However, traditional ceramic coatings are cumbersome to apply on complex shapes like the wheel spokes.
Waxes and sealants can do good work on body panels, but because wheels work in such a harsh environment, those products will not last more than a few weeks up to a couple of months.
Our spray ceramic coating, Ceramic Spray, provides the protection and durability of ceramics and the ease of use of polymer sealants. Give it a try and you’ll be stunned by the results.
Step 6) Torque Your Wheels To Specification
Don’t forget to torque your wheels properly. All that detailing work is worth nothing if the car doesn’t stay in one piece.
★★★★★ "My car is slick as glass!! I put the Ceramic Spray on my Corvette Stingray and it is very slick and shiny. I should have purchased it sooner. It is a great product. It made my wheels look new. Keeps off dirt and dust." - Charlie F.
Bottom Line On Cleaning Chromies
Okay, what did we learn about chromed wheels?
On a daily driver, it’s best to go for PVD chrome. It gets you almost all of the bling with fewer drawbacks, easier maintenance, and amazing longevity. PVD finishes are always clear-coated for protection, so you can clean and maintain them just as you would the majority of aluminum wheels out on the road. You can use the same products and if you have more than one car, do both without purchasing a different kit.
All that said, traditional chrome plating has not lost its appeal. PVD is great, but up close, you’ll find that it doesn’t perfectly match the real deal. If you have a classic muscle car, a vintage hot rod, or a show car, the good old chromies will feel right at home and keep all eyes pinned to your ride.
Now that your rims are all nice and clean, grab your favorite tire cleaner and complete the shine!
I help run the day to day for America's Number #1 Car Wax Mirror Shine by Torque Detail. As a Certified Detailer by the International Detailing Association, I use that knowledge to help create products that get professional grade results with super simple application techniques.