Hand-washing your car can be a relaxing way to spend an afternoon and lets your car get a little TLC.
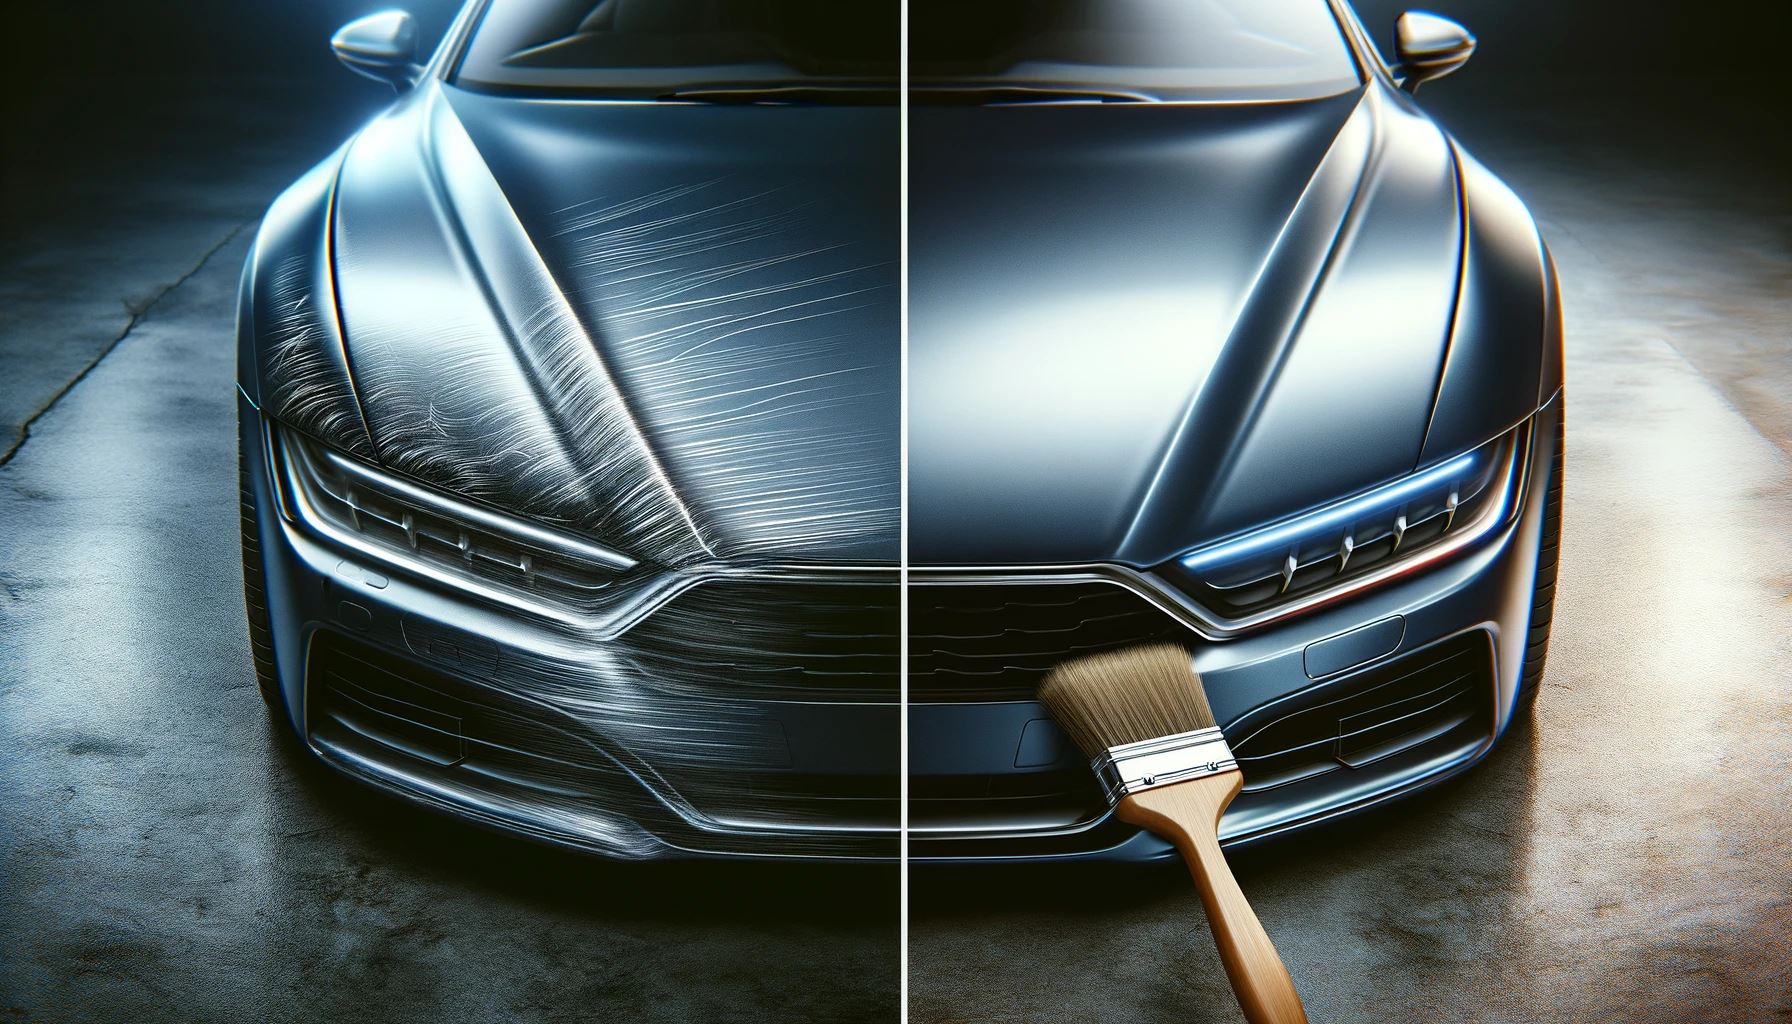
First, however, you must know how to hand wash your car to prevent scratches and other damage to your car’s finish. Washing your vehicle incorrectly can create small scratches, more commonly known as swirl marks, that can detract from the look of your car’s paint.

There are a few different ways of hand-washing your car that are gentle on your car’s finish and can minimize the risk of causing scratches or other damage to your paint. With a little knowledge and the right equipment, you can safely get a spotless car from the comfort of your driveway.

★★★★★
6k+ Verified Customer Reviews
Redline Shine is a 7H hardness polysiloxane ceramic coating that protects your vehicle from grime, contaminants & chemicals. You’ll get up to 2 years of protection even in the harshest conditions.
Method 1: Two-Bucket Method (Recommended)
The two-bucket method is a simple way to care for your car at home. It’s been shown time and again to prevent swirl marks when done correctly and can help keep your paint job looking brand new for years.
You may be familiar with the standard one-bucket method. With it, you fill a bucket with soapy water and spread it around your car with a wash mitt or cloth.
This does a decent job of removing dirt and grime from your vehicle, but it also leaves much of it behind. Even worse, every time you dunk your wash mitt back into that bucket, you can pick up grit that can lead to scratches and swirls.
The purpose of adding a second bucket is to get rid of all that grit so it can’t get dragged across your car and create scratches. To get started with this method, all you need is:
- Two buckets
- Decon Car Wash Kit
- Two grit guards (optional)

Step 1: Soak Your Car
To get started, soak your car with plain water. This step gets the loose dirt and grime off. Be careful not to use too much pressure to avoid grinding the dirt and grit into your car’s finish instead of rinsing it off.
This is also a good time to wash your wheels and tires before you start on the rest of your car. As this is the dirtiest part, if you wait to wash them you could just splash dirty water back onto your clean car.
For your tires, you’ll need a separate wash mitt that won’t be used for your vehicle since the wheels often have brake dust and other gritty materials that can scratch your finish.
Step 2: Fill Your Buckets
Once your car has been well-rinsed, fill both buckets with water, then add your car shampoo to one of the buckets. This will be your soap bucket. The other bucket will be your rinse bucket where you’ll rinse the grit out of your wash mitt. If you’re using grit guards, place one at the bottom of each bucket.
Step 3: Suds Up Your Car
With the presoak done and your buckets ready, dunk your wash mitt in the soap bucket and gently apply the soap to your car, moving in straight lines.
Start from the roof and work down to avoid having dirty water run down on a freshly cleaned section. You should be rinsing your wash mitt in your rinse bucket between each area, and the dirtier your car, the smaller your sections should be.
If the water in your rinse bucket starts looking particularly dirty, it’s a good idea to change the water and wash out all the grit collected at the bottom. Similarly, if you see any dirt in your soap bucket, you should empty it, refill it, and mix it with fresh soapy water.
Step 4: Rinse and Dry
Once your car is thoroughly covered in soap, it’s time to rinse it off.
Make sure you use fresh water and not the water in either bucket. You don’t want to waste all that effort you just put in by throwing dirty water on your freshly cleaned car.
Finally, dry your car using a microfiber towel. Work as quickly as possible to dry your car before the water evaporates and leaves behind water spots. Once your vehicle is dry, you’re all done washing your car!
Method 2: Foam Gun Method
The foam gun method accomplishes the same goal as the two-bucket method but with a few different pieces of equipment.
Instead of using a dedicated soap bucket and a wash mitt, you spray on the soap as foam using a foam gun. This touchless soap application reduces the risk of scratches and is a quick and efficient way of cleaning.
Foam guns aren’t something everyone has lying in their garage, but they are relatively easy to purchase. Just make sure you choose a high-quality foam gun from a reputable brand to minimize the risk of mishaps and malfunctions that may lead to something damaging getting sprayed on your car.
Besides the foam gun, you’ll need:
- A bucket
- Your favorite car shampoo
- A microfiber towel for drying
- A wash mitt
- A grit guard (optional)
Step 1: Soak Your Car
Before using your foam gun, spray your car with clean water to rinse off the loose dirt and grime that may get dragged across your car in later steps. Avoid high-pressure water streams that can force the grit deeper and create scratches.
Like the two-bucket method, this is the best time to wash your wheels. You can safely clean the wheels without spraying dirty water on a clean car. Of course, you still want to keep the wash mitt you use on your wheels separate from the one on the rest of your body.
Step 2: Set Up Your Supplies
After you rinse your car, you want to ensure you have all your supplies ready.
Then, fill your foam gun with your car shampoo and turn it to the appropriate setting. Next, fill your bucket with fresh water to rinse your mitt in, and place your grit guard in the bottom if you’re using one. Once everything’s set up, you’re ready to start washing.
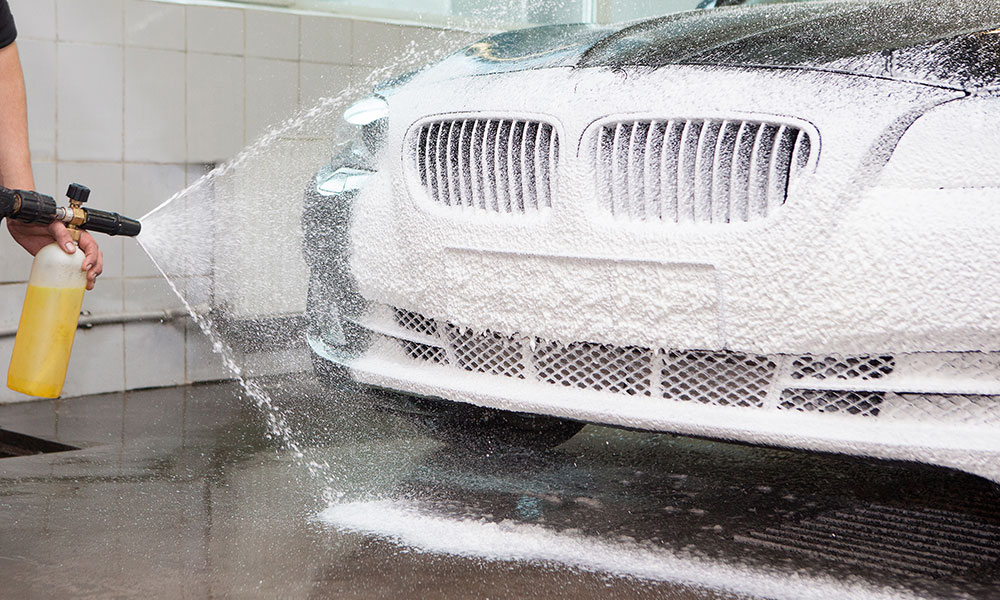
Step 3: Let the Foam Fly
After thoroughly rinsing your car, attach your foam cannon and start coating it in foam. You want to ensure the foam layer is thick enough that you can’t see the paint underneath it but not so thick it slides off.
If you still have some larger patches of dirt on your car that didn’t rinse off, allow the foam to soak for 2-3 minutes, rinse it off, and reapply it. Repeating this process until the obvious patches of dirt are gone.
Once that’s done, you can move on to the next step.
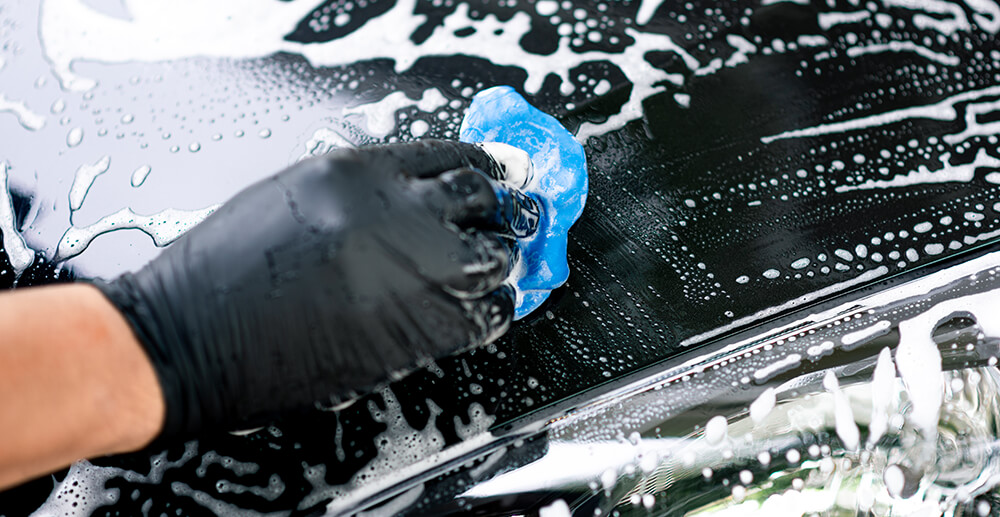
Step 4: Scrub it In
With a good lather on your car, grab your wash mitt, get it wet in your rinse bucket, and lightly scrub your vehicle, starting from the top. Avoid using too much pressure to prevent any grit your wash mitt picks up from grinding against your car’s finish and leaving behind scratches or swirl marks.
Make sure you rinse your wash mitt out frequently in your rinse bucket. The dirtier your car was when you started, the more regularly you need to rinse your wash mitt.
Step 5: Rinse and Dry
After scrubbing each section of your car, rinse the foam with fresh, clean water, starting from the top. Once you get all the soap and soap residue washed away, it’s time to begin drying.
Use your microfiber towel and work quickly to wipe off all the water sitting on your car. If the towel becomes soaked, switch it out with a fresh one to ensure you get your car as dry as possible. This will prevent water spots from forming.

★★★★★
High Rated Reviews from 150+ Customers
After a simple spray and wipe down using a microfiber towel, your car’s paint job will be protected for up to an entire year. Your car’s top coat impenetrable to any chemical, liquid, or environmental contaminant there is. In a matter of minutes!
Why Hand-Washing is a Great Fit For The DIYer
Hand-washing your car can be a great way to ensure your vehicle is clean and well-maintained.
A good wash is always the first step if you’re applying any wax, paint sealant, or any other coating. No matter how it’s done, is important to maintaining your car’s appearance and the longevity of its paint and finish. Therefore, you should always include washing your car in its general maintenance schedule.
There are several ways you can wash your car, but you should to avoid methods that will leave behind scratches and swirl marks. Instead, you want to make sure you use a soft cloth that won’t scratch your paint and a dedicated car shampoo that won’t strip off superficial layers of your car’s finish.
As long as you have the right equipment and a good working knowledge of properly washing your car, you can have a spotless, glossy vehicle any time you want without a time-consuming trip to a professional detailer.

I help run the day to day for America’s Number #1 Car Wax Mirror Shine by Torque Detail. As a Certified Detailer by the International Detailing Association, I use that knowledge to help create products that get professional grade results with super simple application techniques.